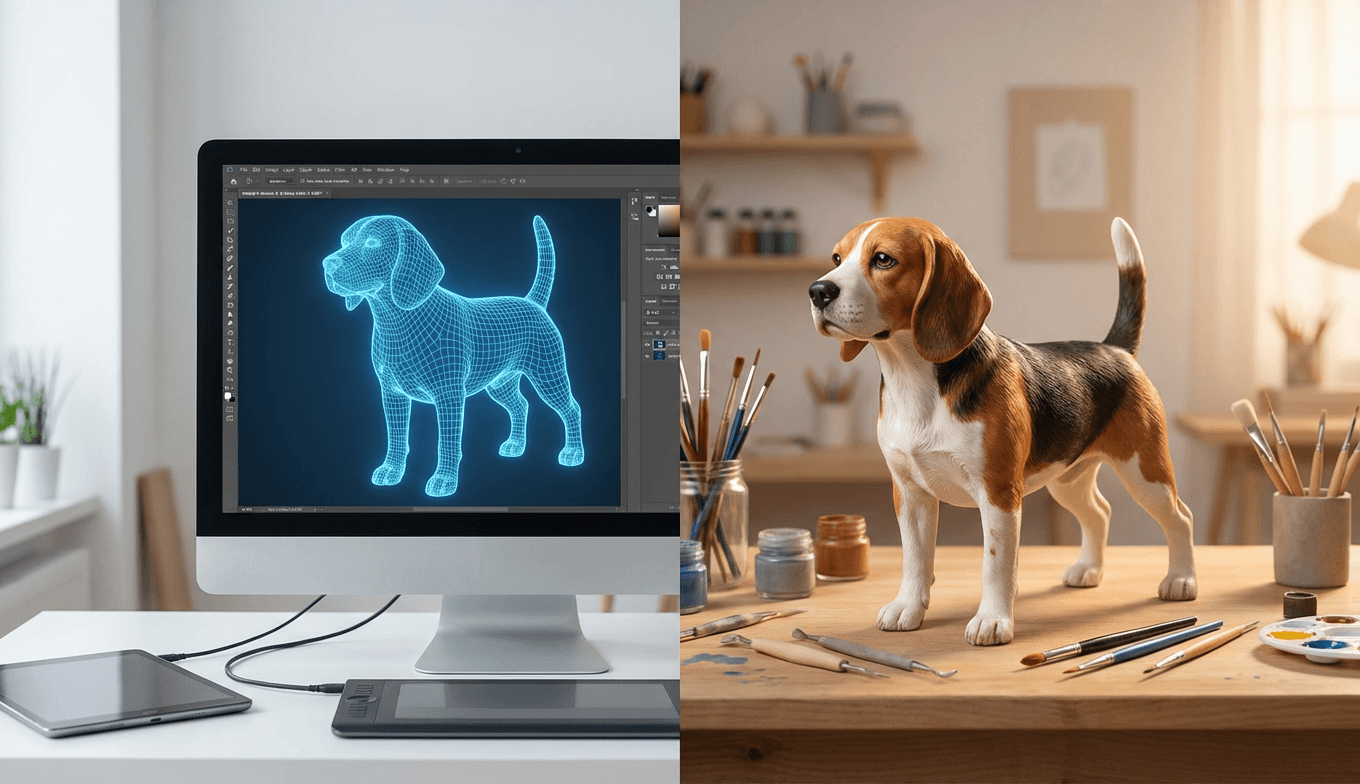
From Photo to Statue: How We Create Your Custom Pet Figurine
The cursor blinks on the screen, hovering over the "Upload" button, but your hand hesitates. You’re staring at that photo—the one where the sunlight hits the scruff of his neck just right, catching the grey hairs that started appearing around age ten. It’s not the most perfectly composed shot. The background is a messy kitchen counter, and there’s a blurry chew toy in the corner. But it’s him. It captures the specific tilt of his head when he heard the word "cheese," the asymmetry of his ears, the soul behind those eyes. It’s the photo you look at when the silence in the house gets too loud. You aren't just uploading a JPEG; you are handing over a memory and asking us to make it tangible again.
Quick Takeaways:
- It’s Not Just "Scanning": We don't just scan photos. Digital sculpting is an artistic process where we manually interpret 2D pixels into 3D geometry, focusing on bone structure and fur texture.
- Resin vs. Filament: We use SLA/MSLA (liquid resin) printing, not the common FDM (plastic wire) method, because it’s the only way to capture microscopic details like nose texture and individual whiskers.
- The "Hollow" Truth: Solid statues crack. We hollow models and add hidden drain holes to prevent suction forces from ripping the print apart during creation.
- UV is the Enemy: Unpainted resin degrades in sunlight. Our multi-stage painting and UV-resistant clear coating process is critical for longevity.
- Turnaround Reality: Quality takes time. Expect 3-6 weeks, because curing resin and hand-painting layers cannot be rushed without risking structural failure later.
The Digital Clay: Why "Auto-Generate" Doesn't Work
There is a misconception in the 3D printing world that you can simply feed three photos of a Golden Retriever into a computer, press a button, and out pops a perfect 3D model. If only it were that simple. While photogrammetry (scanning objects with cameras) exists, it requires the subject to sit perfectly still while 50+ cameras fire simultaneously. Your beloved pet, especially if they have passed on, cannot do this. And AI generators? They tend to create "generic dog" shapes that lack the specific soul of your animal.
We start with "digital clay." Our artists use software like ZBrush, which is essentially the industry standard for high-end character creation in movies and video games. But instead of monsters or superheroes, we are sculpting your Bella or Max.
When we receive your photos, we aren't looking at them like a casual observer. We are looking at anatomical landmarks. We look for the occiput (that bump on the back of the skull), the stop (the angle between the snout and forehead), and the specific way the hock joints bend. A common mistake in amateur sculpting is ignoring the gravity of fur. Fur isn't a solid block; it hangs, clumps, and flows over the muscle underneath.
We recently worked on a sculpture for a cat named Luna who had a very specific kink in her tail from an old injury. A generic model would have straightened that tail, "fixing" it. But to Luna’s owner, that crooked tail was her signature. We spent three hours just sculpting that specific angle. If we miss those imperfections, we miss the pet.
The Engineering of Light: Understanding SLA Printing
Once the digital sculpt is approved, we move to the physical realm. This is where the veteran engineering comes in. Most hobbyists are familiar with FDM printers—the ones that melt a spool of plastic wire and squirt it out like a hot glue gun. Those are great for functional brackets, but terrible for organic shapes. The layer lines are visible, and they can't handle the fine detail of fur.
At PawSculpt, we use Stereolithography (SLA) or Masked Stereolithography (MSLA).
Here is the plain English explanation of a complex chemical process: We have a vat of liquid photopolymer resin. This resin is photosensitive—it turns from liquid to solid when hit with UV light. Our printers use a high-resolution LCD screen (for MSLA) or a laser (for SLA) to flash a specific image of a single layer onto the bottom of the resin tank. The build plate dips into the goo, the light flashes, and a layer of plastic—often only 0.05mm thick (thinner than a human hair)—hardens instantly.
The plate lifts up, peels the fresh layer off the bottom film, dips back down, and does it again. Thousands of times.
The Art of Orientation
You might think we just print the dog standing upright on its feet. That is actually the worst way to do it.
When the print peels off the bottom of the vat, it creates "suction force." Imagine trying to pull a boot out of deep mud. If we print a dog standing up, the cross-section of the paws is tiny, but as the print grows to the belly, the surface area explodes. That sudden increase in suction can rip the paws right off the build plate.
Instead, we orient the model at an angle—usually 30 to 45 degrees backwards. This minimizes the surface area of each layer, reducing that peeling force. It also ensures that the "support marks" (the little scaffolding points we add to hold the print in place) are located on the belly or under the tail, rather than on the face or back. We treat the face as sacred ground; no supports touch the eyes or nose if we can help it.
Hollowing and the "Suction Cup" Effect
A solid block of cured resin is heavy, expensive, and surprisingly fragile. Resin heats up as it cures (an exothermic reaction). If a statue is solid, the heat gets trapped inside, causing the model to crack or warp weeks later.
We hollow every model to a wall thickness of about 2-3mm. But hollowing creates a new problem: the suction cup effect. If you print a hollow ball without a hole, it creates a vacuum against the resin tank film. The printer will pull and pull until... pop. The film tears, or the print fails.
We strategically place "drain holes" in hidden areas (usually the bottom of the paws or under the collar). These holes allow air to flow in—breaking the vacuum—and allow uncured liquid resin to flow out. If we leave liquid resin trapped inside your statue, it will eventually crack the model from the inside out, leaking toxic goo onto your shelf months later. We’ve seen this happen with cheap competitors, and it’s heartbreaking for the owner.
Post-Processing: The Dirty Work
When the printer finishes, the job is only 40% done. The figurine that emerges looks like a sci-fi alien—dripping with slime and covered in scaffolding supports. It is toxic to the touch and smells like a chemical plant.
The Wash
First, the model goes into a bath of Isopropyl Alcohol (IPA) or a specialized resin detergent. We use a two-stage wash. The "dirty wash" removes the bulk of the slime. The "clean wash" gets into the deep crevices of the fur texture. If we don't wash it perfectly, the leftover resin will cure into white, chalky residue that ruins the detail.The Cure
Right now, the plastic is "green"—it's soft and not fully reacted. We place the model in a UV curing chamber. This is a turntable surrounded by high-intensity UV LEDs. The light penetrates the resin, cross-linking the polymer chains to reach final hardness.Here is a trade-off many don't understand: Over-curing vs. Under-curing.
- Under-cure: The model remains toxic and soft. It might weep liquid later.
- Over-cure: The resin becomes yellow and extremely brittle, like glass.
We dial in our cure times based on the specific resin blend we use. We often use "ABS-like" resins mixed with "Tough" resins to give your figurine some flexibility. If you drop a standard resin statue, it shatters. Ours are engineered to survive a tumble from a coffee table (though we don't recommend testing this!).
Support Removal: The Surgeon’s Hand
Removing the scaffolding is tedious. You can’t just rip them off, or you’ll leave "pockmarks" or divots in the model. We use flush cutters to snip the supports a few millimeters away from the surface, then sand the nubs down manually.This is where the "engineer" puts on the "artist" hat again. Sanding a smooth surface is easy. Sanding a nub off a texture that is supposed to look like curly Poodle fur? That requires recreating the texture with a micro-file or sculpting putty to hide the surgery scar.
Priming and Painting: Bringing the Ghost to Life
Raw resin is usually grey or translucent. It looks cool, but it looks like a prototype, not a pet.
We start with a high-grade automotive primer. Why automotive? Because it bites into the plastic and creates a chemical bond. Standard acrylic primer often scratches off resin too easily. The primer also reveals flaws—tiny layer lines or support marks we missed during sanding. If we see a flaw, we sand and prime again.
The "Subsurface" Technique
Painting a pet isn't like painting a wall. A black dog isn't just black. If you paint a statue flat black, it looks like a silhouette.Real fur absorbs and reflects light. A black Lab has hints of blue in the highlights and warm browns in the shadows. A white cat has pink undertones where the skin is thin (ears, nose) and yellow/cream tones where the fur is thicker.
We use an airbrush to lay down the base coats, creating "volumes" of color. We paint the shadows first—the deep recesses between the legs, under the ears. Then we highlight the raised areas.
Then comes the brushwork. We use "dry brushing" to catch the tips of the fur texture, and "washes" to darken the recesses.
The eyes are the most critical part. We don't just paint a black dot. We paint the sclera, the iris color, the pupil, and crucially, the "catchlight"—that tiny white reflection that makes the eyes look wet and alive. We finish the eyes and nose with a high-gloss varnish to mimic moisture, contrasting with the matte finish of the fur.
I remember painting a figurine of a Boxer named Duke. He had heterochromia—one brown eye, one blue. The owner sent a frantic email right as we started production, terrified we’d forget. When she received the figurine, she told us she spent twenty minutes just staring at that blue eye. It wasn't just paint; it was the specific asymmetry of his gaze.
Durability and Chemistry: Why It Lasts
We often get asked, "Can I put this in my garden?"
The honest answer from an engineer: No.
Resin is a UV-reactive material. Even when fully cured and painted, constant exposure to direct sunlight (UV radiation) will eventually break down the polymer chains. The paint helps shield it, but over years, thermal cycling (hot days, cold nights) will cause the resin to expand and contract differently than the paint, leading to cracking.
However, for indoor display, we engineer these to last generations. We seal every custom figurine with a UV-resistant matte clear coat—the same kind used by museum archivists to protect artifacts. This prevents the paint from yellowing and protects against oils from your hands.
Handling Your Memory
When you unbox your figurine, you’ll notice it has a specific weight. It’s not hollow-feeling like a cheap toy, but not heavy like stone. It feels substantial.We advise holding the figurine by the base or the main body (the torso). Avoid picking it up by thin extremities like tails or ears. While our "tough resin" blend is durable, physics is physics. A 1mm thick tail tip is the weak point.
The Emotional Trade-off: Why We Don't Rush
In the world of Amazon Prime, we are used to "Order Today, Get Tomorrow."
Custom manufacturing doesn't work that way. If we rush the digital sculpting, the likeness suffers. If we rush the printing (lifting the plate too fast), the layers delaminate. If we rush the curing, the model stays toxic. If we rush the paint, the layers don't bond.
The hardest part of our job is telling a grieving pet owner that their memorial will take 4-6 weeks. We hear the disappointment in their voice. They want that tangible connection now.
But we also know the alternative. We know what a rushed print looks like in two years—yellowed, cracked, and peeling. We are building a memorial, not a trinket. A memorial needs to stand the test of time, just like the memory of the pet it represents.
One customer, Sarah, wrote to us about her cat, Mochi. She said the six weeks of waiting felt like an eternity. But when the box arrived, she realized that the anticipation was part of the process. It gave her time to prepare a space on her mantle. When she finally placed Mochi’s figurine there, it wasn't a replacement for her cat, but a permanent anchor for her love.
Frequently Asked Questions
Can you fix a broken ear on my figurine if I drop it?
Because we use resin, standard superglue (cyanoacrylate) works incredibly well for repairs. It actually bonds the resin chemically. However, prevention is best. If a break is clean, a tiny dot of superglue and 30 seconds of pressure usually makes it invisible. For severe shatters, reach out to us—we often keep digital files on hand for a discounted reprint.Why do you need photos from multiple angles?
We are building a 3D geometry in a virtual space. If we only have a front photo, the computer (and the artist) has to guess how long the snout is or how the ears attach to the back of the head. "Profile" (side view) photos are actually more important than front views for getting the head shape correct. A top-down view is the "secret weapon" for getting the body width right.Is the resin toxic to my other pets?
Once fully cured and sealed with our clear coat, the figurine is inert and safe to touch. However, it is not food safe. If your new puppy chews up the memorial of your old dog (ironic, but it happens), they shouldn't ingest the fragments. The resin itself isn't highly toxic once cured, but the shards can be sharp and cause internal blockages. Keep it on a high shelf!Why does my figurine look slightly different than the 3D render?
The 3D render is a digital approximation using perfect, calculated lighting. The physical object interacts with real-world light. Subsurface scattering (how light moves through the paint) creates a softer look than a digital screen. Additionally, because every piece is hand-painted, slight variations in brush strokes make your piece truly one-of-a-kind.Can you make a figurine of a pet that has already passed if I only have blurry photos?
Yes, but it requires more artistic interpretation. In these cases, we ask for descriptions of their personality. Was he chunky? Did she have a sleek coat or a fluffy undercoat? We can use "reference breeds" for the anatomy and use your blurry photos to capture the color patterns and specific markings. It becomes a collaboration between your memory and our sculpting.There is a moment in the process—usually right after the final matte coat dries—where the object stops being a piece of plastic and starts being a presence. The shine on the nose catches the workshop light, and for a split second, it looks like it twitched.
That is why we obsess over drain holes, lift speeds, and UV wavelengths. Not because we love the chemistry (though we do), but because we know that when you open that box, you aren't looking for a statue. You're looking for a reunion.
We take the time to get the engineering right so you can focus on the feeling. If you’re ready to start that process, or just want to see if your photos will work, reach out to the team at PawSculpt. We’d be honored to learn their story.
Ready to Get Started?
Now that you know what goes into creating the perfect pet figurine, it's time to bring your vision to life. Our master sculptors are ready to capture every detail that makes your pet unique.
Free instant AI preview • 3D artist preview within 7 days • 5 free revisions
