Behind the Sculpt: How Your Boxer's Photo Becomes a Full-Color 3D Printed Masterpiece
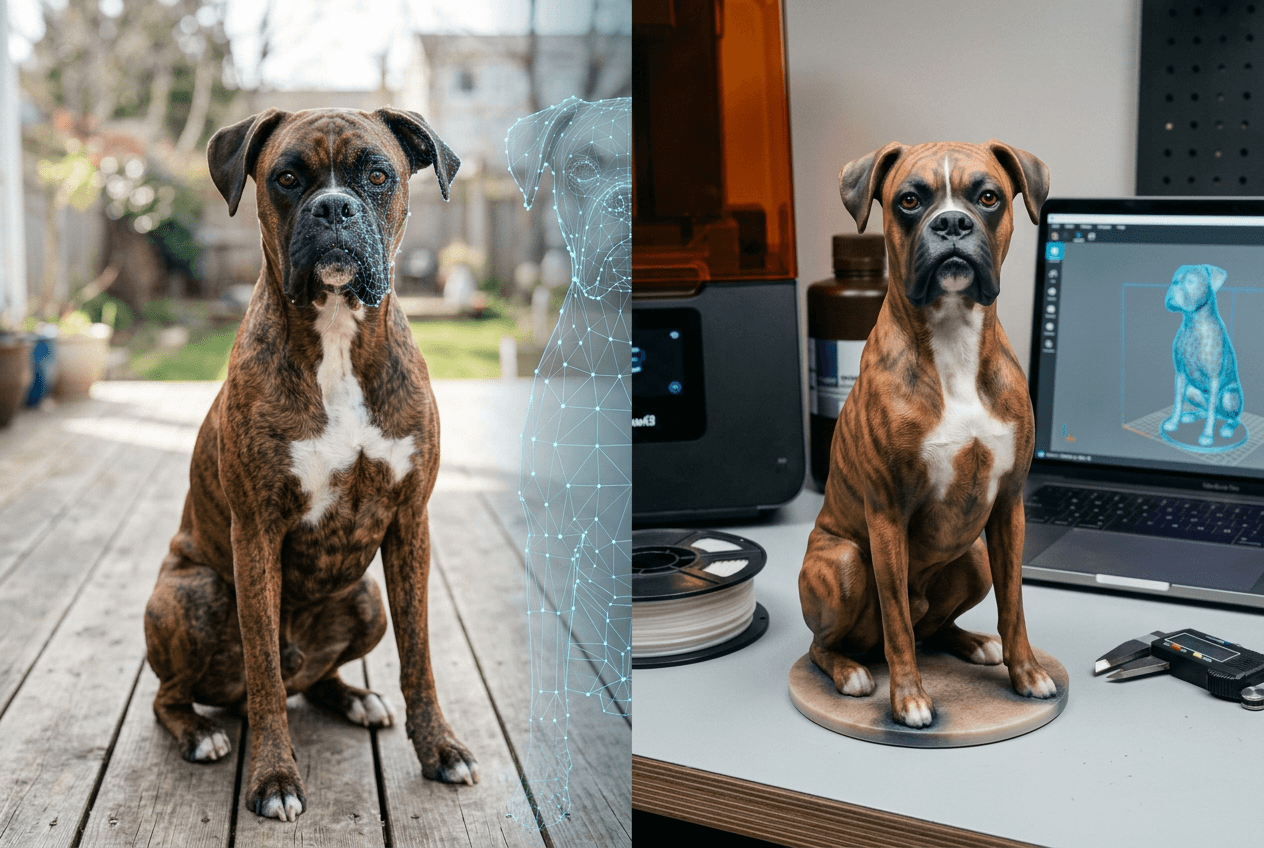
You're standing in your basement at midnight, scrolling through old photos on your phone, and your thumb stops on one: your Boxer mid-stride, jowls loose, ears forward, that unmistakable wrinkled forehead catching the light. You can almost feel the velvet grain of that short, dense coat under your fingertips. And somewhere between nostalgia and curiosity, you wonder—could a 3D printed pet figurine actually capture this?
Quick Takeaways
- Your photos are the blueprint — the quality and variety of reference images directly determines the accuracy of your Boxer's digital sculpt
- Full-color 3D printing embeds pigment into resin — colors aren't painted on afterward; they're built into the material itself, voxel by voxel
- Boxer anatomy poses unique sculpting challenges — brachycephalic muzzles, underbites, and ultra-short coats demand specialized digital modeling techniques
- The process from photo to figurine involves five distinct stages — explore how PawSculpt's custom pet figurines move from reference photos through digital sculpting, printing, post-processing, and quality control
- Post-processing is where the magic solidifies — UV curing, support removal, and clear coat application transform a raw print into a display-worthy keepsake
Why Boxers Are One of the Hardest Breeds to Sculpt Digitally (And What That Means for Your Figurine)
Here's something most pet figurine guides won't tell you: not all breeds are created equal when it comes to digital sculpting difficulty. Golden Retrievers, Poodles, Huskies—their long or textured coats are actually forgiving. Flowing fur hides minor imperfections in geometry. It gives the sculptor room to stylize.
Boxers? They offer no such mercy.
That sleek, single-layer coat means every anatomical landmark is visible. The brachycephalic skull (the shortened, broad head shape that gives Boxers their distinctive pushed-in face) leaves zero margin for proportional error. Get the muzzle-to-skull ratio even slightly off, and the figurine stops looking like your Boxer and starts looking like a generic bulldog. The American Kennel Club's Boxer breed standard describes a head that should be "in clean lines, showing no wrinkle" from certain angles—but from others, those forehead folds are the entire personality.
This is the counterintuitive insight most people miss: a breed with "less" visible detail (short coat, minimal feathering) actually demands more precision than a heavily-furred breed. The sculptor can't rely on texture to carry the likeness. They have to nail the underlying structure—the bone, the muscle, the way skin drapes over the zygomatic arch (cheekbone).
We've worked with hundreds of Boxer owners at PawSculpt, and the ones who are happiest with their figurines are the ones who understand this going in. So let's walk through exactly how the process works, from the photos on your phone to a full-color resin figurine you can hold in your hand.
The Photo-to-Sculpt Workflow: What Your Reference Images Actually Need to Show
Why "Just Send Your Best Photo" Is Terrible Advice
Most custom figurine companies will tell you to send your favorite photo. That's fine for a starting point—it captures the emotional truth of your pet. But a single photo is almost never enough for an accurate custom pet sculpture, especially with Boxers.
Here's why. A photograph is a 2D projection of a 3D animal. It flattens depth cues, distorts proportions based on lens focal length (phone cameras are notoriously bad for this—they widen noses and compress ears), and captures only one moment of muscle tension. Your Boxer sitting relaxed on the couch has a completely different silhouette than your Boxer at alert attention in the yard.
What actually helps a digital sculptor:
- 3-5 photos minimum, covering front, side profile (both sides if markings differ), three-quarter view, and a top-down angle
- Consistent, diffused lighting — harsh sunlight creates deep shadows in those Boxer face wrinkles, which can mislead the sculptor about actual depth
- At least one photo where your dog is standing naturally — this gives proportional data for leg length, chest depth, and topline
- Close-ups of distinguishing features — that one crooked canine tooth visible in the underbite, the specific brindle pattern on the left shoulder, the white blaze shape
| Photo Type | What It Reveals | Common Mistake |
|---|---|---|
| Front-facing | Ear set, chest width, facial symmetry | Phone too close (distorts muzzle width) |
| Side profile | Body proportions, topline, tail set | Dog turning head (hides true profile) |
| Three-quarter | Overall 3D form, how features relate | Background clutter confusing the silhouette |
| Top-down | Shoulder width, spine curvature, coat pattern | Taken too far away (loses detail) |
| Detail close-ups | Unique markings, scars, eye color | Flash photography (washes out color) |
One thing we've noticed working with Boxer owners specifically: brindle patterns are deceptively complex. What looks like "brown stripes on fawn" in person is actually dozens of tonal variations—amber, mahogany, near-black, golden—all blending at different densities across the body. The more reference you provide for coat color, the more accurately the digital artist can map those tones into the 3D model.
The Digital Sculpting Stage: Where Art Meets Anatomy
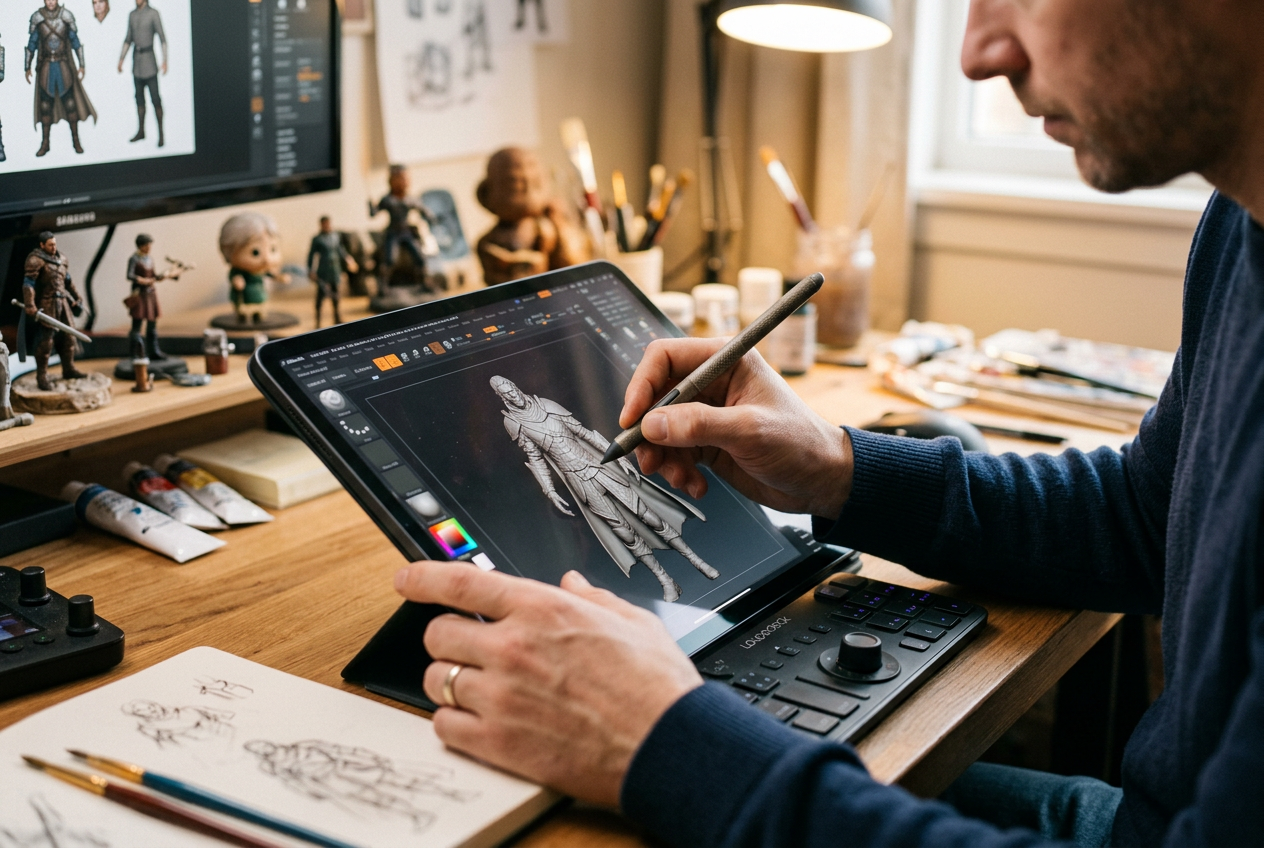
Once reference photos are gathered, the digital sculptor begins building your Boxer in 3D modeling software like ZBrush or Blender. This isn't tracing a photo or running an image through an algorithm. It's a manual, artistic process—a skilled human being pushing virtual clay, polygon by polygon, to reconstruct your pet in three dimensions.
The sculptor typically starts with a base mesh (a rough dog-shaped starting point) and then begins the real work: reshaping the skull to match your Boxer's specific head type, adjusting the proportional relationships between muzzle length and cranial width, sculpting the characteristic Boxer underbite where the lower jaw protrudes slightly beyond the upper.
"Every Boxer's face tells a different story. The underbite, the wrinkle depth, the ear crop or natural fold—we treat each one as a portrait, not a breed template."
— The PawSculpt Team
Here's where it gets technically interesting. The sculptor is constantly doing proportional checks—overlaying the 3D model against reference photos from matching angles to verify that ratios are correct. Is the distance from the stop (the indentation between the forehead and muzzle) to the nose tip roughly one-third of the total head length? Does the chest depth match the elbow height? These aren't arbitrary checks. They're the geometric relationships that make a Boxer look like a Boxer, and more importantly, make your Boxer look like your Boxer.
The coat flow on a Boxer is subtle but critical. Even though the hair is short—typically around 1-2 centimeters—it has directional patterns. Hair flows backward along the ribcage, forward on the chest, and in whorls around the shoulders. A skilled sculptor will suggest this directionality through very fine surface texture in the digital model, even though individual hairs aren't modeled at that scale.
"A figurine doesn't need to reproduce every hair. It needs to reproduce the feeling of the coat under your hand."
How Full-Color 3D Printing Actually Works (And Why It's Not What You Think)
This is where most articles about how 3D pet printing works get it wrong. They either describe the process as if it's traditional sculpture (it's not) or they gloss over the technology entirely. Let's get specific.
The Technology Behind Full-Color Resin Printing
PawSculpt uses full-color 3D printing technology—think PolyJet or Multi Jet Fusion (MJF) style processes. Here's what that means in plain terms:
The printer doesn't lay down white material and then color it afterward. Instead, it builds the figurine layer by layer, and at each layer, it deposits UV-curable photopolymer resin (a liquid plastic that hardens when hit with ultraviolet light) with color pigments already mixed in. The color is embedded directly into the material itself. Think of it like a full-color inkjet printer, but instead of printing flat pages, it's stacking thousands of colored layers on top of each other to build a 3D object.
The technical term for this is voxel-level color control. A voxel is essentially a 3D pixel—a tiny cube of material. Each voxel can be assigned a specific color, which means the printer can reproduce complex patterns like brindle coats, heterochromatic eyes, or the subtle pink-to-black gradient on a Boxer's nose leather.
Layer heights typically fall in the 25–50 micron range (a micron is one-thousandth of a millimeter—for reference, a human hair is roughly 70 microns wide). At these resolutions, individual layers are nearly invisible to the naked eye, though you can sometimes detect a fine grain texture on the surface. This is a characteristic of the technology, not a defect—and honestly, it gives the figurine a warmth and tactile quality that perfectly smooth surfaces lack.
Myth vs. Reality: What Most People Get Wrong About Pet Figurines
Myth #1: "Custom pet figurines are hand-painted miniatures."
Reality: At PawSculpt, there is no painting stage. Zero brushes. Zero acrylics. The full-color resin 3D printing process embeds pigment directly into the material during fabrication. The only manual finishing step is applying a clear protective coat for UV resistance and a subtle sheen. This is a fundamentally different process from traditional miniature painting—and it means the color won't chip, flake, or wear off the way surface-applied paint can.
Myth #2: "3D printing means it's automated and impersonal."
Reality: The 3D printer is a tool, not the artist. The digital sculpting phase—where your Boxer's likeness is created from scratch by a human sculptor working in 3D software—is intensely personal and skill-dependent. It's comparable to a photographer using a high-end camera: the technology captures the image, but the human behind it composes, lights, and directs the shot. The boxer figurine process involves hours of human artistic labor before the printer ever starts.
Myth #3: "Resin figurines are fragile and will break easily."
Reality: This one has a grain of truth, but it's more nuanced. UV-cured photopolymer resin is rigid—it won't flex like rubber—but it's significantly more durable than people expect. A figurine sitting on a shelf or in a display case will last indefinitely. The main vulnerabilities are impact from drops onto hard surfaces (like tile or concrete) and prolonged direct sunlight exposure without UV-resistant clear coat, which can cause yellowing or "bloom" (a whitish haze on the surface). The clear coat application during post-processing specifically addresses the sunlight issue.
| Property | Full-Color Resin 3D Print | Traditional Hand-Painted Figurine |
|---|---|---|
| Color Application | Embedded in material during printing | Surface-applied paint (acrylics, oils) |
| Color Durability | Won't chip or flake (color is structural) | Can chip, crack, or fade over time |
| Detail Source | Digital sculpt resolution + print resolution | Artist's brush skill and paint consistency |
| Surface Texture | Fine grain from layer lines; smooth clear coat | Smooth or textured depending on technique |
| Customization | Unlimited color variation per voxel | Limited by paint mixing and application |
| Production Time | Digital sculpt + print + post-processing | Sculpt/mold + multiple paint sessions + drying |
Inside the Print: Orientation, Supports, and the Tradeoffs Nobody Talks About
This is the section that separates a genuine process explanation from marketing copy. If you really want to understand what goes into your 3D printed pet figurine, you need to understand the engineering decisions that happen before the printer starts.
Why Print Orientation Matters More Than You'd Think
Imagine holding a tiny Boxer figurine and tilting it at different angles. Now imagine that one of those angles is how the figurine sits inside the printer during fabrication. The orientation of the model relative to the print bed affects everything: surface quality, structural integrity, the number and placement of support structures, and even how accurately fine features like ears and tails reproduce.
Here's the tradeoff. If you orient the figurine standing upright (paws on the build plate), the flat bottom surfaces print cleanly, but the underside of the chin, chest, and belly may need dense support structures that leave tiny marks—called support pitting or witness marks—when removed. Orient it at an angle, and you can minimize supports on visible surfaces, but you introduce the risk of staircase stepping on curved areas (where the layer-by-layer construction creates tiny stair-step artifacts on slopes).
The print technician has to balance these competing concerns for every model. For Boxers specifically, the broad, flat chest and the thin, sometimes cropped ears present opposite challenges. The chest needs solid, well-supported construction to avoid warping (where internal stress causes the part to curl or deform during curing). The ears—especially natural, floppy Boxer ears—are thin and delicate, and heavy supports on their inner surfaces would leave marks in a highly visible area.
Hollowing, Drain Holes, and Why Your Figurine Isn't Solid
Most pet figurines above a certain size are hollowed before printing. A solid resin figurine would be unnecessarily heavy, waste expensive material, and—here's the part most people don't know—actually be more prone to failure. Large solid cross-sections of UV-cured resin can develop internal stress during the curing process, leading to warping or even cracking days after printing.
Hollowing the model to a wall thickness of typically 2-4 millimeters solves these problems, but it introduces another: trapped uncured resin. If the hollow interior is fully sealed, liquid resin gets trapped inside during printing and can leak out later or cause internal pressure during final UV curing. The solution is drain holes—small openings (usually 1.5-3mm diameter) placed in inconspicuous locations like the underside of the base or between the paw pads.
On a Boxer figurine, the base or belly underside is the typical drain hole location. After printing, the technician drains excess resin, performs additional UV curing to harden any remaining interior residue, and sometimes seals the holes for a cleaner finish.
The Suction Cup Effect (And Other Failure Modes You've Never Heard Of)
Here's one from the shop floor that you genuinely won't find in most articles. During layer-by-layer printing, when the build plate lifts between layers, it creates a suction effect on hollow or concave features. Think of pulling a suction cup off a window—that's the force acting on your figurine's hollowed-out interior or on concave surfaces like the inside of a Boxer's ear fold.
If the suction force exceeds the adhesion of the partially-cured resin, layers can separate or delaminate, ruining the print. This is why experienced print technicians add internal supports or adjust lift speeds for models with large hollow cavities. It's a failure mode that only practitioners who've dealt with dozens of failed prints truly understand—and it's one reason why the "just hit print" perception of 3D printing is so misleading.
Other common failure modes the team watches for:
- Over-cure blooming: Excessive UV exposure during post-curing causes a chalky white haze on the surface. The fix is careful timing and controlled UV intensity.
- Under-cure tackiness: Insufficient curing leaves the surface slightly sticky or soft. This compromises durability and clear coat adhesion.
- Support scarring on detailed features: Supports placed on the Boxer's wrinkled forehead or jowls can leave marks that are difficult to clean without losing sculpted detail.
- Color shift from resin batch variation: Different batches of photopolymer can produce slightly different color temperatures. Experienced operators calibrate and test before committing to a final print.
Post-Processing: The Invisible Labor That Makes Everything Work
The figurine that comes off the printer isn't finished. It's close—the colors are there, the shape is there—but it needs a series of post-processing steps to become the object you'll actually hold, display, and treasure.
Washing and Curing
First, the raw print goes through a solvent wash (typically isopropyl alcohol or a specialized cleaning solution) to remove uncured liquid resin from the surface. This step is more critical than it sounds. Residual uncured resin left on the surface will remain tacky, interfere with the clear coat, and can yellow over time.
After washing, the figurine goes into a UV curing chamber—essentially a box lined with UV LEDs—for a controlled final cure. This hardens any remaining soft spots and brings the resin to its full mechanical strength. The duration and intensity matter: too little, and the surface stays soft; too much, and you get the bloom effect mentioned earlier. It's a calibrated balance, not a set-it-and-forget-it step.
Support Removal and Surface Cleanup
This is the most painstaking manual step. Support structures—the thin pillars and lattices that held the figurine's overhanging features during printing—need to be carefully removed. On a Boxer figurine, supports typically cluster under the jaw, between the legs, under the tail, and along the ear edges.
The technician uses flush cutters (small precision snips) and fine-grit sanding tools to remove supports and smooth the contact points. The goal is to make the support locations invisible—or at least unnoticeable during normal viewing. This is where experience matters enormously. An inexperienced operator might sand too aggressively and flatten a sculpted wrinkle, or leave a nub that catches the clear coat and becomes a visible bump.
Raking light inspection is the quality control method here. The technician holds the figurine under a light source positioned at a low angle (almost parallel to the surface), which makes even tiny surface imperfections cast visible shadows. It's the same technique art conservators use to examine paintings. Any remaining support marks, layer lines, or surface artifacts get addressed before the figurine moves to the next stage.
Clear Coat Application
The final step is applying a clear protective coat—a thin layer of UV-resistant varnish that serves three purposes:
- UV protection: Prevents the resin's embedded pigments from fading or yellowing in ambient light
- Surface unification: Gives the entire figurine a consistent sheen, smoothing out minor texture differences between areas that had supports and areas that didn't
- Tactile finish: Creates a smooth, slightly satiny surface that feels pleasant to touch—important for something you'll want to pick up and hold
The clear coat is the only thing applied to the surface after printing. There's no color being added at this stage. The brindle pattern, the white chest blaze, the dark mask around your Boxer's eyes—all of that was printed directly into the resin. The clear coat just protects and enhances what's already there.
"The best technology disappears. You shouldn't see the process—you should just see your dog."
What to Expect: The General Journey from Order to Unboxing
Without getting into specific timelines or policies (which you can find on the PawSculpt FAQ page), here's the general arc of what happens when you commission a custom pet sculpture through a full-color 3D printing service:
Stage 1 — Photo Submission and Consultation
You submit your reference photos and share details about your Boxer's personality, distinctive features, and any preferred pose. This is your chance to mention the things photos might not capture: "She always tilts her head to the left when she's curious" or "His left ear never fully stands up."
Stage 2 — Digital Sculpting
A 3D artist builds your Boxer's likeness from scratch in digital sculpting software. You'll typically receive a digital preview—a rendered image of the 3D model from multiple angles—so you can review the likeness and request adjustments before anything is printed. This preview stage is crucial. Changes are easy in digital; they're impossible once the resin is cured.
Stage 3 — Full-Color 3D Printing
Once you approve the digital sculpt, it's prepared for printing (orientation, supports, hollowing) and sent to the full-color resin printer. The print itself, depending on size and complexity, can take several hours to a full day.
Stage 4 — Post-Processing
Washing, curing, support removal, surface cleanup, and clear coat application. This stage involves the most hands-on human labor of the entire process.
Stage 5 — Quality Control and Shipping
Dimensional checks against the digital model, symmetry verification, surface inspection under raking light, and color accuracy review. Then careful packaging—resin figurines need cushioning against impact—and shipping to your door.
| Stage | What Happens | Key Human Input |
|---|---|---|
| Photo Submission | Owner provides reference images and notes | Communicating personality and unique details |
| Digital Sculpting | 3D artist models the pet in software | Artistic interpretation, proportional accuracy |
| Preview & Revision | Owner reviews digital renders | Feedback on likeness, pose, expression |
| Full-Color Printing | Figurine is built layer by layer in colored resin | Print technician sets orientation and supports |
| Post-Processing | Wash, cure, support removal, clear coat | Manual cleanup and finishing |
| Quality Control | Inspection against reference and digital model | Trained eye for surface quality and accuracy |
For details on turnaround times, revision policies, and pricing, visit pawsculpt.com directly—those specifics are better answered by the team than approximated here.
Caring for Your Finished Figurine: What Resin Needs (and Doesn't Need)
Once your Boxer figurine arrives, it's remarkably low-maintenance—but a few things are worth knowing.
Keep it out of sustained direct sunlight. The clear coat provides UV resistance, but no coating is infinitely durable. A shelf that gets eight hours of direct afternoon sun will stress any resin over months and years. Indirect light or interior display locations are ideal.
Dust it gently. A soft, dry microfiber cloth is all you need. Avoid household cleaners, especially anything with acetone or strong solvents—these can soften or cloud the clear coat. If something sticky gets on the surface, a cloth barely dampened with water will handle it.
Handle the thin features with care. Your Boxer's ears (especially if modeled in a natural, floppy position) and tail are the most vulnerable points. They won't snap from normal handling, but dropping the figurine onto a hard floor could fracture a thin extremity. This is physics, not a quality issue—the same is true of ceramic, porcelain, or glass figurines.
Temperature matters less than you'd think. Cured photopolymer resin is stable across normal indoor temperature ranges. It won't warp on a warm mantelpiece or become brittle in an air-conditioned room. Extreme heat (like inside a car on a summer day, where temperatures can exceed 150°F) is the only real thermal concern—at those temperatures, the resin can begin to soften.
The figurine's surface has a distinctive texture that's worth mentioning. It's smooth—smoother than sandstone or unfinished ceramic—but it has a fine, almost imperceptible grain from the layer-by-layer construction. Under the clear coat, this gives it a satiny, organic feel. Many owners have told us it reminds them of touching a smooth river stone: cool, solid, and grounding. When you're holding it and running your thumb across the chest or along the muzzle, there's a weight and presence to it that flat photos or digital images simply can't replicate.
The Emotional Dimension: Why a Physical Object Matters
We'll be real with you. We could write about 3D printing technology all day—and clearly, we have strong feelings about layer heights and support strategies. But the reason any of this matters isn't technical.
It's the moment you open the box.
We've heard this from thousands of pet families, and the pattern is remarkably consistent. There's a pause. A sharp intake of breath. Sometimes laughter—"Oh my God, that's exactly her face." Sometimes tears. Often both.
A family we worked with recently had lost their senior Boxer, Duke, to lymphoma. His owner told us she'd been struggling because she could remember his personality—the goofy head tilts, the way he'd lean his full 70 pounds against her legs—but she was starting to lose the specifics of his face. The exact shape of his mask. The way one ear folded slightly differently than the other. When she held the figurine for the first time, she said it was like her memory snapped back into focus.
That's not something a photo on a phone can do. Photos are flat, behind glass, mixed in with screenshots and grocery lists. A figurine occupies physical space. It has weight. It sits on your nightstand or your desk and catches your eye at unexpected moments—when you're reaching for your coffee, when you're on a phone call, when you're just passing through the room. It doesn't demand your attention. It simply exists, the way your dog used to simply exist in the background of your daily life.
And for owners of living pets, the motivation is different but equally valid. You know your Boxer's face right now—the gray coming in around the muzzle, the specific energy in those dark eyes. You want to freeze this version of them. Not because you're anticipating loss (though honestly, that's part of it), but because this moment, this age, this particular expression—it matters to you. And it deserves to be held.
If you're considering a 3D pet sculpture of your Boxer—or any breed—the best time to gather reference photos is now, while you can still ask them to sit, stay, and look at you with that magnificent, slightly confused Boxer expression.
Frequently Asked Questions
What photos work best for a custom 3D printed pet figurine?
Aim for 3-5 photos covering front, side profile, three-quarter view, and top-down angles. Use diffused, natural lighting (overcast days are ideal) and include close-ups of any unique markings, scars, or features. Avoid flash photography, which washes out subtle color variations—especially important for brindle Boxers.
How is a full-color 3D printed figurine different from a hand-painted one?
Full-color 3D printing embeds pigment directly into the resin during fabrication. The color is part of the material, not a layer applied on top. This means it won't chip, flake, or wear away the way surface-applied paint can. The only thing applied after printing is a clear protective coat for UV resistance and sheen.
Are resin pet figurines fragile?
They're more durable than most people expect. UV-cured photopolymer resin is rigid and stable for display use—a figurine on a shelf or in a case will last indefinitely. The primary vulnerability is impact from drops onto hard surfaces like tile or concrete. Thin features (ears, tails) are the most at-risk areas, similar to ceramic or porcelain pieces.
How should I care for my 3D printed pet figurine?
Keep it out of sustained direct sunlight, dust with a soft dry microfiber cloth, and avoid cleaners containing acetone or strong solvents. Normal indoor temperatures are fine. The clear coat provides significant UV protection, but no coating lasts forever under constant sun exposure.
Can a 3D printed figurine capture my Boxer's brindle pattern accurately?
Yes—this is actually one of the strengths of full-color resin printing. Because the printer controls color at the voxel level (individual 3D pixels), it can reproduce the complex tonal variations in brindle coats that would be extremely difficult to replicate by other methods. The more reference photos you provide showing the pattern from different angles, the more accurate the result.
What is the clear coat on a 3D printed figurine for?
The clear coat serves three functions: UV protection (prevents color fading and resin yellowing), surface unification (creates a consistent sheen across the entire figurine), and tactile finish (a smooth, satiny feel). It's the only post-printing surface treatment applied—no color is added at this stage.
Ready to See Your Boxer in Full Color?
You already know what makes your Boxer extraordinary—the wrinkled concern on that broad forehead, the brindle pattern no other dog shares, the underbite that somehow looks dignified and goofy at the same time. A 3D printed pet figurine captures those details in full-color resin you can actually hold, turn in your hands, and set somewhere you'll see it every day.
Visit pawsculpt.com to see examples, learn about the process, and get started with your own Boxer's portrait in resin.
