What If Your Calico's Patches Print Wrong? A Beginner's Fix-It Guide for Color Mismatches
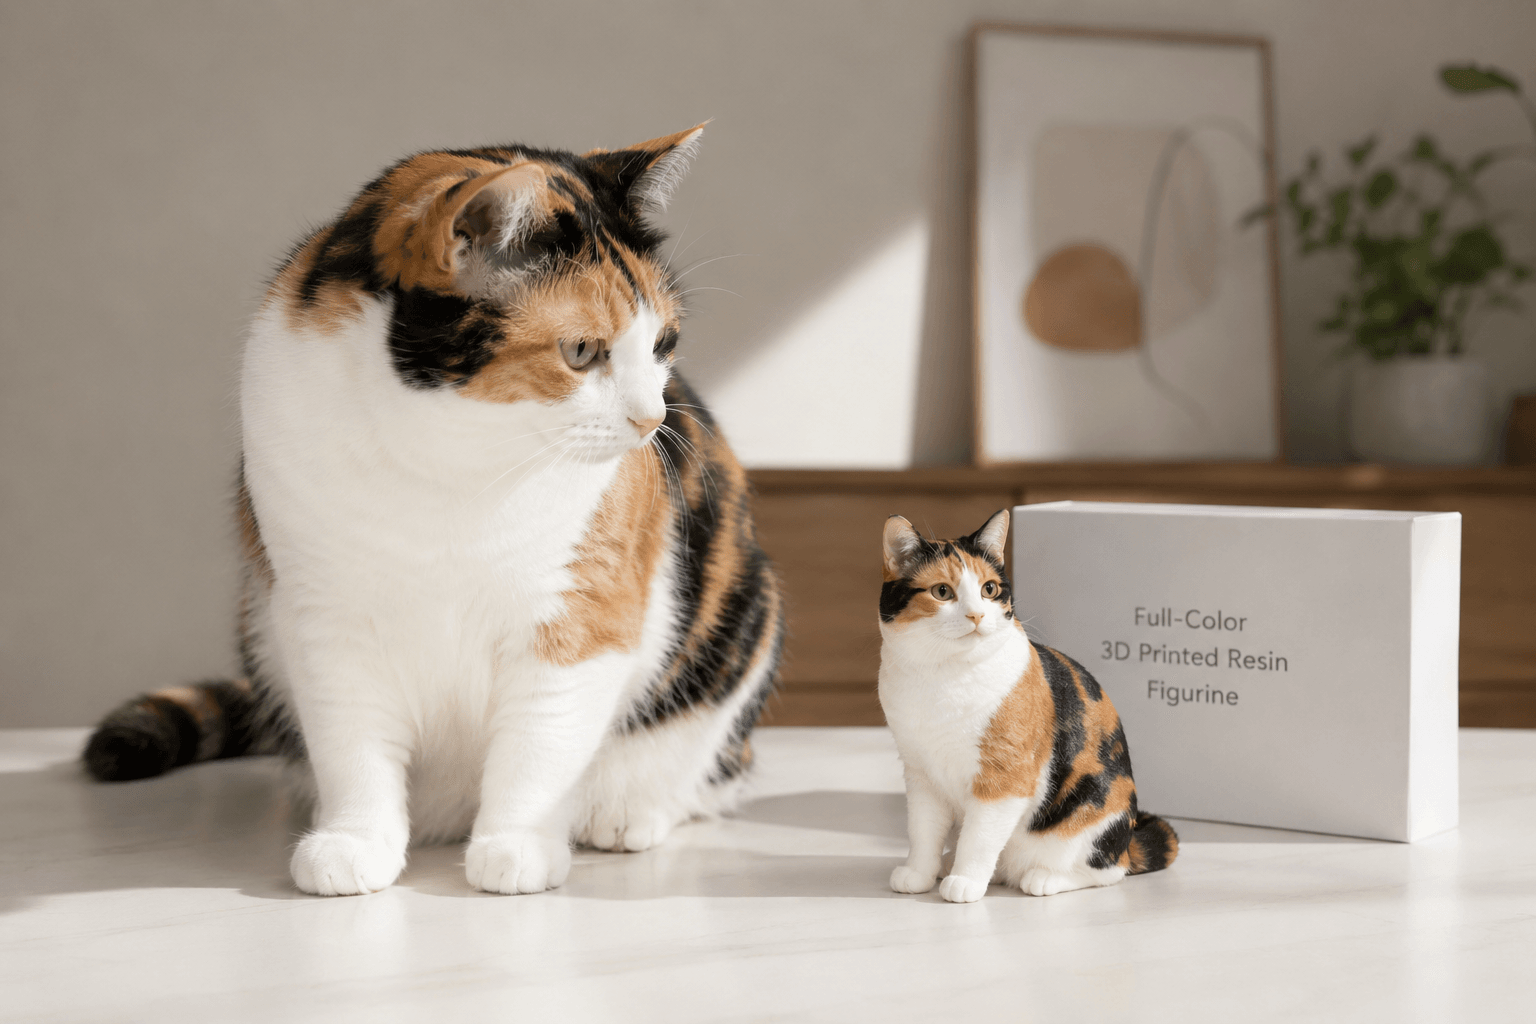
You're halfway down the trail, phone out, holding the little resin figurine up against the autumn light—and the calico figurine color is off. One orange patch sits where a black one should be, and your stomach drops a little. That's not your cat. Not quite.
Quick Takeaways
- Calico color "errors" usually start upstream — in the digital texture stage, not the 3D printer itself.
- Real calicos are asymmetrical by nature — a too-perfect, mirrored pattern is actually the wrong fix.
- Your reference photos decide everything — five good angles beat fifty blurry ones.
- Most mismatches are fixable at the proof stage — review the digital preview before anything is printed, and lean on the custom pet figurine team to map patches correctly.
- Color shift between screen and resin is normal — knowing this saves you from rejecting a good print.
Why Calico Patches Are the Single Hardest Pattern to Reproduce
Let's be honest about what you're actually asking for when you order a calico figurine. You're asking someone to reproduce randomness. Controlled, biological, gorgeous randomness.
A calico's coat is the result of a genetic coin-flip that happens early in development, cell by cell. The patches of orange, black, and white aren't designed. They're not symmetrical. They don't follow a rule you could write down. Geneticists call this X-chromosome inactivation—and if you want the deeper science, the American Kennel Club and feline genetics resources explain how the same mechanism shapes tortoiseshell coats too.
Here's what that means for you and your figurine: there is no "correct" calico template. Every single one is a one-off original. So when an artist sculpts and prints your cat, they're not filling in a coloring book. They're transcribing a pattern that exists nowhere else in the world.
"A calico isn't a color scheme. It's a fingerprint made of fur."
That's why this pattern trips up beginners more than any solid tabby or tuxedo ever will. With a black cat, you can be a little loose. With a calico, a patch that lands two millimeters too far left reads instantly as wrong—even to someone who couldn't tell you why.
The memory problem nobody warns you about
We worked with a customer last year—we'll call her by her cat's name, Marigold, because that's how she introduced herself in every email. Marigold was a fifteen-year-old calico, mostly white with a splash of orange over one eye and a black "saddle" across her back.
When the first digital proof came back, the owner was upset. The orange patch looked too small. Too pale. Wrong.
So we asked her to lay her reference photos side by side. And here's the thing she discovered, the thing almost everyone discovers: the figurine matched the photos exactly. Her memory didn't match the photos.
Your brain doesn't store your pet as a precise map. It stores a feeling, a gestalt, an emotional impression that gets warmer and bolder every time you miss them. That gap between memory and reality is real, and it's the root cause of a huge share of "color mismatch" complaints. We'll come back to Marigold.
Where Color Mismatches Actually Come From (It's Probably Not the Printer)
Most online guides treat a figurine like a magic box. Photo goes in, statue comes out, and if the colors are wrong, the "machine messed up." That's almost never what happened.
To fix a mismatch, you need to know where in the pipeline it was born. Let me walk you through how a full-color figurine is actually made, in plain shop-floor terms, because the fix lives at a specific stage.
Step one: digital sculpting
First, a master artist builds your cat as a digital sculpt—a 3D model shaped on a screen in software like ZBrush or Blender. Think of it like digital clay. They push and pull virtual material to match your pet's proportions, the set of the ears, the curve of the tail, the flow of the coat.
No physical carving happens here. Nobody is sculpting clay on a table. It's all on a computer, which matters because it means revisions are flexible—you're editing a file, not re-carving a block.
Step two: the texture map (this is where calico color is decided)
Once the shape is right, the artist applies color to the model's surface using a texture map—essentially a digital "skin" that tells every point on the model what color it should be. For a calico, this is the make-or-break stage. The artist is placing your cat's exact patches onto the sculpt, matching position, size, and edge softness to your reference photos.
If a patch lands in the wrong spot, it happened here. Not in the printer. The printer will faithfully reproduce whatever the texture map tells it to—including a mistake.
Step three: full-color 3D printing
Now the file goes to a full-color resin 3D printer (PolyJet and MJF-style technology). Here's the part that surprises people:
"The color isn't painted on afterward. It's printed into the material itself, drop by drop."
The machine builds your figurine in ultra-thin layers—often in the 25 to 50 micron range (a micron is one-thousandth of a millimeter, so we're talking layers thinner than a human hair). As it builds, it deposits UV-cured photopolymer resin with the pigment already embedded. The orange in that patch isn't a coat of acrylic sitting on top. The resin is orange, all the way through that region.
This is fundamentally different from the old "print a white model, then color it" approach. There are no brushes anywhere in our process. The color and the object are born at the same instant, voxel by voxel (a voxel is just a 3D pixel—a tiny cube of colored material).
Step four: post-processing
After printing, the part gets washed to remove uncured resin, cured under UV light to reach full hardness, and support structures get removed. Supports are temporary scaffolds the printer adds to hold up overhangs—like an ear or a lifted paw—so they don't sag mid-print. Where supports touch the model, you can get small pitting or "scars," which is why orientation on the print bed is chosen carefully to hide contact points in low-visibility areas.
The only hands-on finishing step is a clear coat—a protective varnish that adds durability, UV resistance, and a soft sheen. That's it. No color is added by hand at any point.
So when you map a "mismatch" against these four stages, the truth becomes clear:
| Stage | What happens | Can color mismatch start here? |
|---|---|---|
| Digital sculpting | Shape and proportions built | Rarely (shape, not color) |
| Texture mapping | Patches placed on the model | Yes — most mismatches |
| Full-color printing | Color printed into resin | Occasionally (calibration shift) |
| Post-processing | Wash, cure, clear coat | Rarely (sheen, not color) |
The takeaway? The overwhelming majority of calico color problems are caught and fixed at the digital proof stage—before a single drop of resin is printed. That's the most important sentence in this whole guide. You have power at the proof, and almost none after the print.
The Five-Minute Reference Audit Before You Order Anything
Here's the counterintuitive insight that saves the most heartache: the quality of your figurine is decided before the artist starts, by the photos you send. Not by the technology. Not by the price tier. By you, with your phone, in the right light.
Most people send their favorite photo. The cute one. The funny one. The problem is that "cute" and "useful for reproducing patches" are completely different jobs.
A calico needs coverage, not beauty. The artist has to see where every patch begins and ends, on every side. One head-on selfie tells them almost nothing about what's happening on your cat's back, flanks, and tail.
Before you submit, do this quick visual audit. Lay your candidate photos out and check them against this table.
| Angle / Shot | Why it matters for calicos | Lighting tip |
|---|---|---|
| Direct side profile (both sides) | Calicos are asymmetrical—each side is different | Soft daylight, no flash |
| Top-down (from above) | Shows the "saddle" and back patches | Near a window, midday |
| Head close-up, facing forward | Captures face patches and eye markings | Even, shadow-free light |
| Full body standing | Confirms patch proportions and placement | Avoid harsh backlight |
| The "tricky patch" close-up | Documents any unusual or beloved marking | Get close, stay in focus |
A few field notes from doing this a lot:
- Shoot in soft, indirect daylight. Direct sun blows out white patches into pure glare and crushes black patches into a shadow with no detail. Both destroy information the artist needs. An overcast day or a spot near a north-facing window is gold.
- Never use flash. Flash flattens the coat, kills the subtle color gradients, and throws weird reflections off whiskers and eyes.
- Get both sides. This is the one people skip, and it's the one that matters most for calicos. Because the pattern is asymmetrical, the left side genuinely does not predict the right.
- Capture your "anchor" markings up close. That orange splash over one eye, the half-and-half face, the lone black toe. These are the markings your heart will check first when the figurine arrives. Document them deliberately.
"Send the photo that tells the truth, not the one that gets the most likes."
So what's the payoff? Every minute you spend on reference photos is a minute the artist doesn't have to guess. And guessing is exactly where mismatches are born.
Back to Marigold
Remember Marigold's owner, convinced the orange patch was too small? When we asked for more references, she realized she only had front-facing photos. The orange over Marigold's eye looked huge in those shots because it was closest to the camera.
Once she sent a true side profile, the proportion in the proof was dead-on. The "error" was a camera-angle illusion. We adjusted nothing on the patch size—we just helped her see her own cat accurately again. That moment, she told us later, felt like meeting Marigold fresh.
How to Read a Digital Proof Like a Pro
Before printing, you'll typically review a digital proof—a rendered preview of the 3D model. This is your moment of power. This is where you catch everything. Treat it like a ritual, not a rubber stamp.
Most people glance at the proof, feel a wave of emotion, and either approve too fast or reject too fast. Slow down. Here's how to actually inspect it.
1. Check patch placement against your side profiles, one side at a time. Don't trust the gestalt. Put your left-side photo next to the left side of the model. Trace each patch boundary with your eye. Does the black saddle start at the same vertebra? Does the orange reach the same point on the shoulder?
2. Check asymmetry on purpose. This one's huge. A natural calico's two sides are different. If the proof looks suspiciously balanced—matching patches on both flanks—that's a red flag, not a feature. Ask whether both sides were mapped from separate reference photos.
3. Inspect under "raking light" in your mind. In our quality control, we tilt parts under a low, angled light to reveal surface texture and any imperfection. You can do a version of this with the proof's rotation: spin the model and watch how patch edges behave as the angle changes.
4. Judge color in honest light. Your screen is not neutral. Phone screens run warm or cool, brightness shifts everything, and "night mode" will wreck your color read entirely. Turn off blue-light filters, set brightness to medium, and look at the proof next to a real reference photo on the same screen so any screen bias affects both equally.
5. Separate "shape feelings" from "color feelings." People often reject a proof for color when they're actually reacting to a shape issue (the face feels off), or vice versa. Name what's bothering you specifically. "The orange is too far back" is fixable. "It just doesn't feel like her" is a starting point for a conversation, not an instruction.
"Every patch tells a story. Our job is to place each one exactly where your memory keeps it."
— The PawSculpt Team
The screen-to-resin color shift is real—and normal
Here's an insider truth that prevents a lot of unnecessary panic. The color you see on a glowing screen and the color you see on a physical resin object will never be identical. A screen emits light. Resin reflects it. Orange especially tends to read a touch warmer or deeper once it's a solid, light-reflecting material under a clear coat.
This isn't a defect. It's physics. A small, expected shift between proof and print is part of how full-color 3D printing works, and a good team will tell you what to expect. If your proof colors are right, your print colors will be right—within that normal, honest range.
Fixing a Color Mismatch: A Calm, Step-by-Step Approach
Okay. Say something genuinely is off. Maybe you spotted it on the proof, maybe the figurine already arrived. Don't spiral. Work the problem in order. Here's the sequence we'd walk a friend through.
- Define the mismatch in one sentence. Not "it's wrong"—be specific. "The black patch on the right hip is missing" or "the orange face patch should cross the nose." Precision is fixable. Vagueness isn't.
- Find the reference photo that proves it. Match your complaint to an actual photo showing the correct version. If you can't find a photo that shows it, the issue may be a memory gap, not a model error (this happens more than you'd think).
- Check whether you reviewed the proof. If the mismatch was visible in the digital proof and got approved, that's the lesson for next time—but most reputable teams will still work with you on it. If you caught it at the proof stage, you're in the easiest possible position: it's just a file edit.
- Contact the team with photo + sentence together. Send your one-sentence description and the proof-photo side by side. This single habit cuts revision rounds dramatically. You're handing them a map, not a feeling.
- Understand what's a quick fix vs. a reprint. A patch repositioned in the texture map is a digital edit—relatively painless. A change that requires reprinting the physical part is a bigger lift, which is exactly why catching it at the proof matters so much.
For specifics on how revisions work, turnaround windows, and what's covered, check the current details on the PawSculpt FAQ page—policies evolve, and the site always has the latest.
The fix that isn't a fix: forcing symmetry
The most common "correction" beginners request is the one that backfires: "Make both sides match." Please don't. A real calico that's been mirrored into symmetry stops looking like a real calico and starts looking like a logo. The chaos is the likeness. Your cat's randomness is the thing your heart recognizes.
If a proof feels "too perfect," the fix is usually to introduce more asymmetry from your second-side reference, not less. Counterintuitive, but it's the difference between a figurine that reads as "a calico" and one that reads as "your calico."
What to Expect: The General Journey From Photo to Figurine
People always want to know the timeline. We won't pin exact days, because production schedules and options vary—the current process and turnaround details live on the site. But here's the general arc so you know what's happening behind the scenes.
| Stage | What's happening | Your role |
|---|---|---|
| Photo submission | You provide reference images | Send 5+ angles, both sides |
| Digital sculpting | Artist builds the 3D model | Wait, trust the process |
| Texture mapping | Patches placed on the model | Prepare to review carefully |
| Digital proof review | You see a preview | Inspect, request changes |
| Full-color printing | Color printed into resin | Wait |
| Post-processing | Wash, cure, support removal, clear coat | Wait |
| Delivery | Figurine arrives | Final joyful inspection |
Notice where your influence concentrates: the front and middle. Photo submission and proof review. By the time something's printing, your decisions are already locked in. This is why we keep hammering the same point—the proof stage is sacred. It's the threshold where a digital file becomes a permanent object that will sit on your shelf for years.
A note on durability and finish
Since we're being practical: full-color resin prints are dimensionally precise and color-rich, but they're collectible display pieces, not chew toys. The clear coat protects against UV fading and everyday handling, but a hard drop onto tile can chip a thin extremity like an ear tip or tail. Keep yours out of direct, blasting sunlight long-term (the clear coat resists UV, but no pigment is truly immortal under a south window), and dust it gently.
The texture, by the way, is part of the honesty of the medium. Look closely and you'll see an incredibly fine grain or layer structure—the fingerprint of additive manufacturing. It's not the slick, dead-smooth surface of injection-molded plastic. We think that's a feature. It reads as real, as made, as present.
The Spiritual Math of Getting It Right
Let me zoom out for a second, because there's something underneath all this technical talk.
When you commission a figurine of your cat, you're not really buying resin. You're building a small sacred space on a shelf. An anchor for presence. A way to keep a soul visible in the room.
That's why a misplaced patch hurts so disproportionately. It's not about the patch. It's about the fear that the essence didn't transfer—that the likeness failed to carry the spirit across. We've watched that fear in hundreds of emails, and we take it seriously, because it's not vanity. It's love doing quality control.
So here's the reframe. The five angles, the proof inspection, the one-sentence precision—these aren't bureaucratic hoops. They're the ritual through which you make sure the right soul shows up. You're not being picky. You're being faithful.
When Marigold's figurine finally arrived, her owner sent us a photo: the little resin calico sitting on the windowsill, in the exact spot the real Marigold used to nap, orange patch catching the morning light. She wrote one line. "It's her. She's home." That's the whole point. That's the legacy made solid.
Frequently Asked Questions
Why does my calico figurine color look wrong?
Usually because of one of two things: a patch was placed slightly off during the digital texture stage, or—more often—your reference photos didn't fully capture the pattern from every angle. Lay the figurine next to a true side-profile photo (not a front-facing one) before judging. Camera angle distorts patch size constantly.
Can a color mismatch be fixed after the figurine is printed?
It depends on when you catch it. At the digital proof stage, fixing a patch is just editing the file—straightforward. After the part is physically printed in full-color resin, a change typically means reprinting, which is a bigger undertaking. That's exactly why we treat the proof review as the most important moment in the whole process.
What photos work best for a custom cat figurine with unusual coloring?
Five or more shots in soft, indirect daylight: both side profiles (calicos are asymmetrical, so each side counts separately), a top-down view, a forward-facing head close-up, and a dedicated close-up of any beloved marking. Skip the flash and the harsh sun. Coverage beats beauty every time.
Is the figurine actually hand-painted?
No. PawSculpt uses full-color 3D printing, where the pigment is embedded right into the UV-cured resin as the figurine is built, layer by layer. There are no brushes and no acrylics anywhere in the process. The only manual step is applying a protective clear coat for durability and a soft sheen.
Why don't the colors on screen match the printed figurine exactly?
Because a screen glows and a physical object reflects light—two different things. A small, predictable color shift between a digital proof and the finished resin print is normal physics, not a flaw. Orange tones in particular tend to look a touch deeper once they're solid and clear coated.
Should I ask for both sides of my calico to look the same?
Please don't. The asymmetry of a calico's coat is the very thing that makes it look like your cat. Forcing both sides to mirror each other makes the figurine read as generic. If anything, the fix for a too-perfect proof is adding more natural asymmetry from your second-side photos.
Ready to Celebrate Your Pet?
Every pet has a story worth preserving. Whether you're honoring a beloved companion who's crossed the rainbow bridge or celebrating your furry friend's unique personality, a custom PawSculpt figurine captures those details that make your pet one-of-a-kind—right down to the irreplaceable, asymmetrical calico figurine color that no two cats share.
Create Your Custom Pet Figurine →
Visit pawsculpt.com to learn more about our full-color 3D printing process, proof review, and quality guarantees.
