What Actually Happens During the Digital Sculpting of Your Shiba Inu Figurine
You're sitting in the vet's waiting room, running your thumb across your phone screen, flipping through every photo of your Shiba Inu you've ever taken—and realizing that not a single one fully captures the way she tilts her head or the exact copper-to-cream gradient along her cheeks. That gap between photo and presence is exactly where digital sculpting pet figurine work begins.
Quick Takeaways
- Your photos are the blueprint — the digital sculpting process lives or dies by the reference images you provide
- Shiba Inus are one of the trickiest breeds to sculpt digitally — their plush double coat and subtle facial geometry demand specific techniques
- Full-color 3D printing embeds pigment directly into resin — there's no painting step, so color accuracy starts in the digital file
- The biggest sculpting bottleneck isn't technology—it's anatomy — getting proportions right matters more than polygon count
- You can explore the full process and submit your own photos at PawSculpt's custom figurine service to see how it works firsthand
Why the Shiba Inu Is a Masterclass in Digital Sculpting Challenges
Most people assume that the hardest dogs to sculpt digitally are the ones with wild, shaggy coats—Komondors, Old English Sheepdogs, that sort of thing. Counterintuitive as it sounds, the Shiba Inu is actually a harder sculpt in many ways. Here's why.
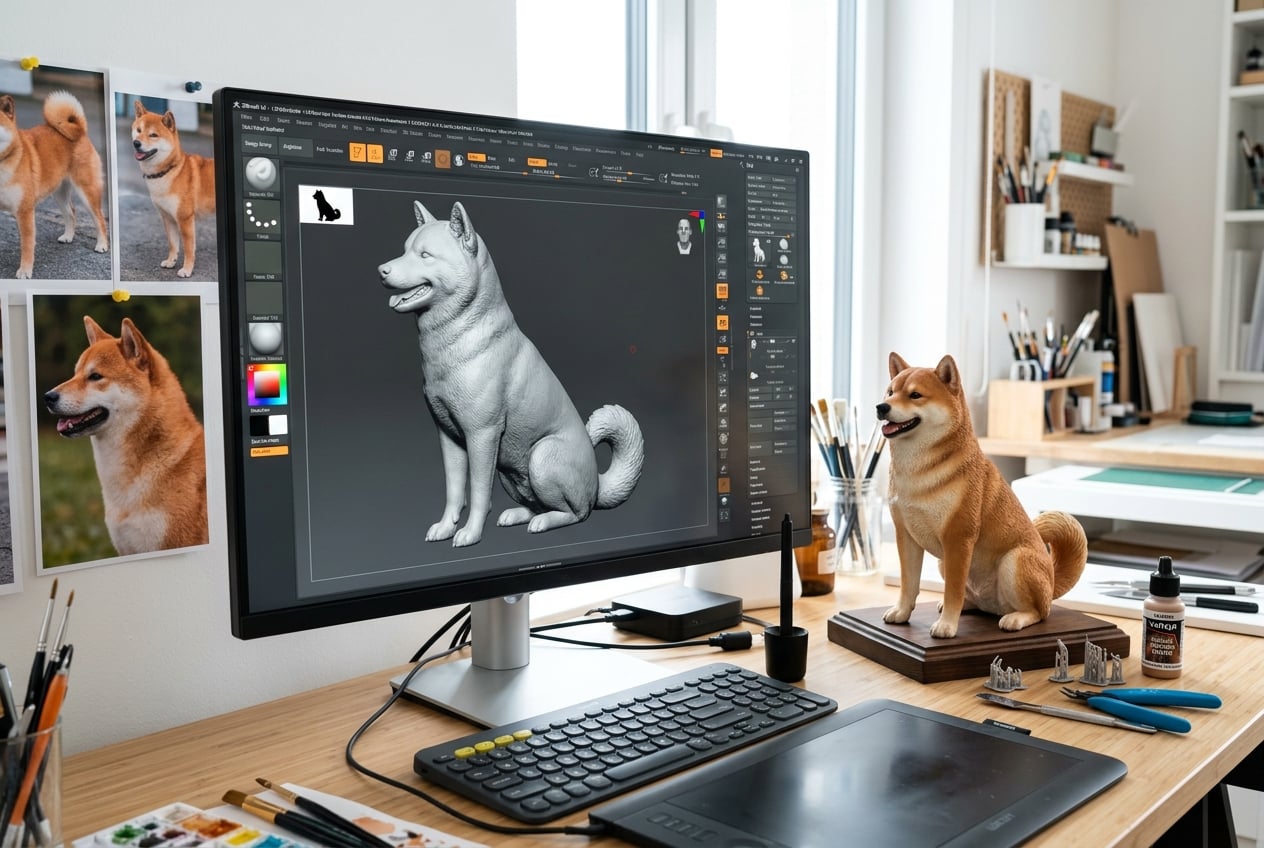
A Shiba's coat is deceptively complex. It's a dense double coat—stiff outer guard hairs over a thick, plush undercoat—that creates volume without obvious texture lines. There's no flowing fringe to sculpt, no curls to define. Instead, you're dealing with a smooth, pillowy surface that has to feel thick without looking flat. In 3D sculpting software like ZBrush or Blender, that means building up subtle surface displacement rather than dramatic geometry. Get it wrong, and your Shiba looks like a smooth plastic toy. Get it right, and you can almost feel the plush resistance under your fingertips.
Then there's the face. Shibas have a very specific facial architecture: triangular ears set at a precise forward angle, a broad forehead that tapers to a defined but not sharp muzzle, and those small, deep-set eyes that carry an almost fox-like alertness. The margin between "looks like a Shiba" and "looks like a generic spitz" is surprisingly narrow—maybe a few millimeters of muzzle width or a slight change in ear angle.
| Sculpting Challenge | Why Shibas Are Tricky | What the Artist Watches For |
|---|---|---|
| Coat texture | Dense double coat with no dramatic features | Subtle volume, not surface noise |
| Ear geometry | Triangular, thick, forward-tilting | Exact angle and thickness ratio |
| Eye placement | Small, deep-set, triangular shape | Depth relative to brow ridge |
| Color transitions | Urajiro (cream underside) blends gradually | Gradient mapping in the 3D file |
| Body proportions | Compact and muscular, not delicate | Chest depth vs. leg length ratio |
| Tail curl | Signature curl varies per individual dog | Tightness, direction, and fur volume of curl |
That last row—the tail—is worth its own mention. Every Shiba owner knows their dog's tail curl is as unique as a fingerprint. Some curl tightly to the left, some loosely to the right, some do a full cinnamon-roll spiral. A digital sculptor who doesn't ask about the tail curl hasn't worked with enough Shibas.
How Custom Pet Figurines Are Made: The Photo-to-Sculpt Pipeline
Here's the part most articles skip entirely. They'll tell you "an artist creates a 3D model," and leave it at that. But the photo-to-sculpt workflow is where the real craft happens, and understanding it will make you a better collaborator in the process.
Step 1: Reference Photo Analysis
The sculptor doesn't just glance at your photos and start modeling. The first real task is proportional mapping—studying your images to extract the specific measurements and ratios that make your dog look like your dog and not just "a Shiba Inu."
Here's what a skilled digital artist is looking for:
- Head-to-body ratio: Shibas are compact, but individual dogs vary. Is your dog slightly leggier? Stockier?
- Ear set and spread: How far apart are the ears? How tall relative to the skull?
- Muzzle length vs. cranium length: This is the single biggest factor in whether the face "reads" correctly
- Coat color boundaries: Where exactly does the red fade to cream? Is the urajiro (the lighter underside markings characteristic of the breed, per the American Kennel Club's Shiba Inu breed standard) sharp or gradual?
- Distinctive features: Scars, one ear that flops slightly, a blaze pattern, asymmetric markings
The mistake most people make is sending only "good" photos—perfectly posed, face-on shots from Instagram. What sculptors actually need are boring, well-lit reference photos from multiple angles. Side profile. Top-down. Three-quarter view. A shot of the tail from behind. Even an unflattering photo under natural light is more useful than a beautifully filtered portrait, because filters destroy the color data the artist needs.
Step 2: Digital Blockout and Proportional Checks
With references locked in, the sculptor begins what's called a blockout—a rough 3D shape that captures the overall silhouette and proportions without any detail. Think of it like a sculptor working with big chunks of digital clay before refining anything.
This is where the artist makes critical decisions:
- Pose selection: Is your Shiba sitting, standing, mid-play-bow? The pose affects everything downstream—center of gravity, base requirements, how the tail interacts with the body
- Silhouette testing: The blockout gets rotated constantly. A good figurine should be recognizable as your specific dog from any angle, not just the front
- Proportional overlay: Some artists will literally overlay the 3D model's silhouette against your reference photos to check ratios
Here's a day-in-the-life moment that illustrates why this matters: imagine you're at your kitchen table on a Saturday morning, coffee in hand, and you get a preview render of your figurine. The first thing you'll notice isn't detail—it's whether the shape feels right. Does it have your dog's posture? That slight forward lean Shibas do when they're curious? If the blockout phase was rushed, no amount of fur detail will fix a proportional miss. Your gut will just say "that's not quite her."
Step 3: Detail Sculpting — Coat, Face, and Anatomy
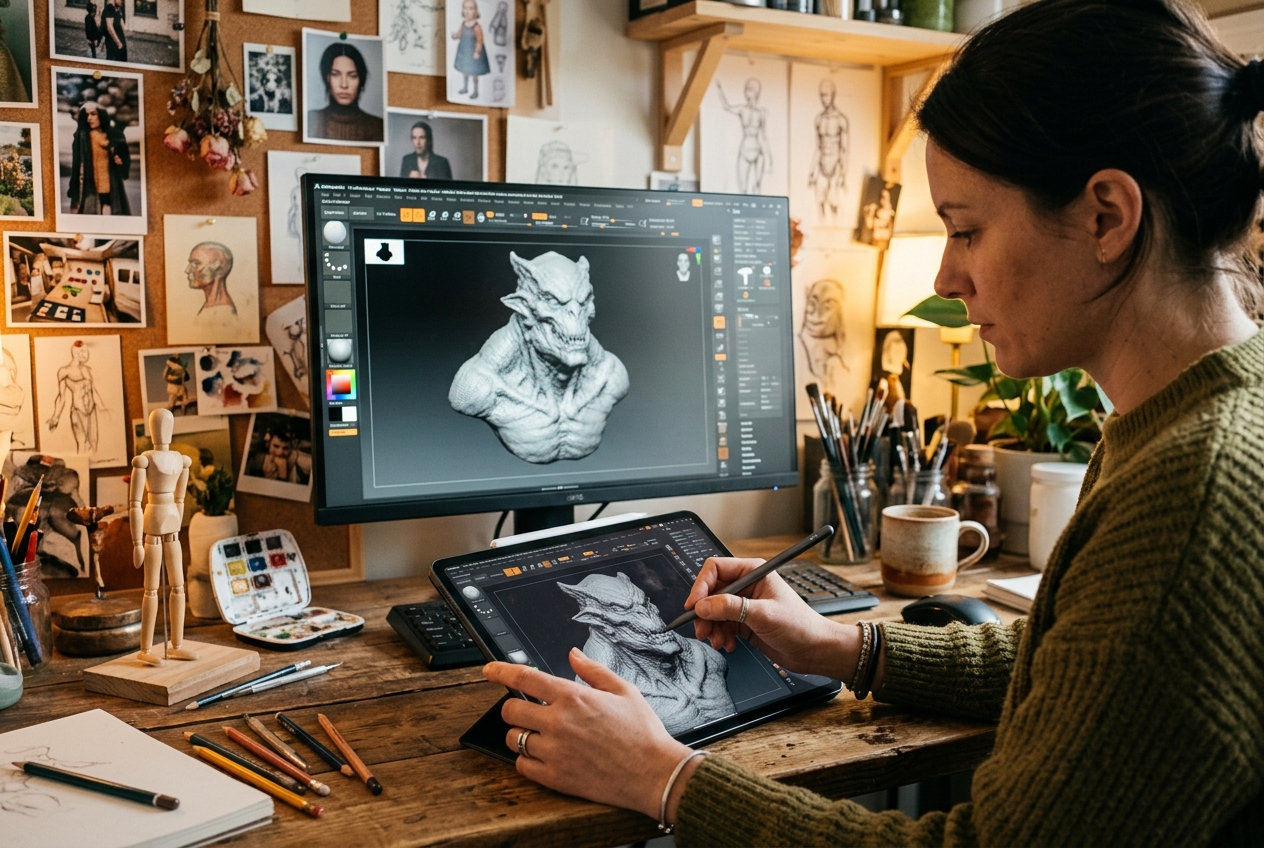
Once proportions are approved, the sculptor moves into detail passes. This is where ZBrush or Blender really shines—the artist uses digital brushes to build up fur flow, define muscle groups under the coat, and refine the face.
For a Shiba specifically, the detail work focuses on:
- Fur direction and flow: The coat on a Shiba's neck ruff flows outward and slightly downward. Along the back, it lies flat. On the tail, it fans out in all directions. Each zone gets sculpted with different brush strokes and patterns.
- Facial expression: Shibas are famously expressive. The artist adjusts the brow ridge, the slight squint of the eyes, the corner of the mouth to capture whether your dog looks alert, relaxed, or doing that classic Shiba side-eye.
- Paw and pad detail: Often overlooked, but the compact, cat-like paws of a Shiba are distinctive. Good sculptors include toe separation and even suggest pad texture on the underside.
"Every whisker direction, every ear angle—these aren't artistic choices. They're observations. The dog tells us what to sculpt."
— The PawSculpt Team
One thing worth noting: digital sculpting for 3D printing is fundamentally different from sculpting for, say, a video game or animated film. Print-ready sculpts must be watertight meshes—meaning the 3D model has to be a completely sealed, solid shape with no holes or overlapping geometry. A game model can cheat with floating geometry and transparency tricks. A print file cannot. Every strand of fur detail that the sculptor adds must be physically connected to the body mesh, or it'll either fail to print or break off during post-processing.
The Full-Color 3D Printing Process: Where Digital Becomes Physical
This is where most explanations of how custom pet figurines are made get it wrong. You'll read vague descriptions that make it sound like a white plastic shape gets produced and then someone sits down with tiny brushes. That's not how PawSculpt works. Not even close.
How Full-Color Resin Printing Actually Works
The technology PawSculpt uses is full-color resin 3D printing—think of it as PolyJet or multi-jet fusion style printing, where the machine deposits and cures photopolymer resin (a liquid plastic that hardens under UV light) in extremely thin layers, typically in the 25–50 micron range (that's 0.025 to 0.05 millimeters per layer—roughly half the width of a human hair).
Here's the key: color pigments are embedded directly into the resin as it's printed. The machine doesn't lay down a white shape and then color it. It mixes and deposits colored resin voxel by voxel—a voxel being a 3D pixel, essentially—so that the color goes all the way through the material at each point. Your Shiba's red coat isn't a surface coating. It's in the resin itself.
This matters for durability. If you nick a traditionally painted figurine, you see white underneath. With full-color resin printing, a small surface scratch reveals... more of the same color. The pigment isn't a layer on top. It's part of the structure.
| Process Aspect | Full-Color Resin 3D Print | Traditional Painted Figurine |
|---|---|---|
| Color application | Embedded in resin during printing | Applied after molding/printing |
| Color depth | Volumetric (goes through material) | Surface only (microns thick) |
| Scratch resistance | Color persists below surface | Reveals base material underneath |
| Gradient capability | Continuous, smooth transitions | Depends on painter skill |
| Consistency | Machine-precise, repeatable | Varies by hand |
| Texture | Fine layer lines with natural grain | Smooth base + brush texture |
Print Orientation and Why It Matters
Here's an insider detail that rarely makes it into consumer-facing content: how the figurine is oriented on the print bed dramatically affects quality.
Every resin 3D print needs support structures—thin scaffolding that holds overhanging features in place while the resin cures layer by layer. Where those supports attach to the model, they leave tiny marks called support pitting or support scars. The sculptor and print technician work together to orient the model so that support contact points land on the least visible surfaces—typically the underside of the base, the belly, or areas hidden by the tail curl.
For a Shiba figurine specifically, the tail presents both a challenge and an opportunity. That curled tail creates an overhang that needs support, but it also hides the area beneath it. A smart orientation places the model so the tail's underside bears most of the support contact, keeping the face, chest, and back pristine.
Other orientation considerations:
- Ear tips: Thin, pointed features like Shiba ears are prone to over-cure (where UV light bleeds through thin sections and hardens them beyond intended dimensions) if oriented wrong. Angling the model so ears print at a slight tilt reduces this.
- Base flatness: The bottom of the figurine's base should align with the build plate or be oriented for easy post-processing to ensure it sits flat on a shelf.
- Suction cup effect: If the model is hollow (and most figurines are, to save material and reduce weight), improper orientation can create sealed cavities that trap uncured resin. Drain holes—tiny openings in inconspicuous locations—prevent this.
Hollowing: The Hidden Engineering
Speaking of hollowing—this is something you'd never know about unless you've worked in additive manufacturing. Solid resin figurines are heavy, expensive (more material = more cost), and prone to internal stress that can cause warping or even cracking as the resin cures and shrinks slightly.
So most figurines are printed hollow, with walls typically 2–3 mm thick. The digital sculptor builds this hollowing into the file, along with drain holes that allow uncured liquid resin to flow out after printing. These drain holes are usually placed on the bottom of the base and sealed during post-processing.
The tradeoff? Thinner walls mean a lighter, more affordable figurine, but also a more fragile one. Too thin, and the walls can flex or crack. Too thick, and you're paying for material you don't need and risking internal cure stress. Finding the sweet spot is part of the craft.
"A figurine should feel substantial in your hand—like it has weight and presence—without being so heavy it feels like a paperweight."
Post-Processing: What Happens After the Printer Stops
The figurine comes off the printer looking... not quite finished. It's covered in uncured resin, possibly still wet, with support structures clinging to it like scaffolding on a building. Here's what happens next.
Washing
The printed figurine goes into an isopropyl alcohol (IPA) bath or specialized cleaning solution to dissolve uncured resin from the surface. This step is critical—leftover resin can cause bloom, a hazy white film that develops on the surface over time if not properly cleaned. The wash usually takes several minutes, sometimes with ultrasonic agitation to reach recessed areas (think of it like a tiny ultrasonic jewelry cleaner).
Support Removal
Support structures get carefully clipped and removed. On a Shiba figurine, the technician pays special attention to areas where supports touched the coat texture—any nubs or pitting get carefully sanded or smoothed. This is painstaking work. Rush it, and you'll feel rough patches where there should be smooth fur. Under raking light (light angled almost parallel to the surface, which reveals even tiny imperfections), the technician inspects every square millimeter.
UV Curing
After washing, the figurine goes into a UV curing chamber for final hardening. This fully polymerizes the resin, bringing it to its final hardness and color saturation. Under-cure leaves the surface tacky and soft. Over-cure can yellow lighter colors or make the resin brittle. The cure time and UV intensity are calibrated to the specific resin and figurine thickness.
Clear Coat Application
This is the only manual finishing step. A protective clear coat—typically a UV-resistant varnish—gets applied to the figurine's surface. This does three things:
- Protects against UV degradation: Resin can yellow or fade with prolonged sun exposure. The clear coat acts as sunscreen.
- Enhances color vibrancy: The coating brings out the depth and saturation of the embedded pigments, similar to how wetting a stone makes its colors pop.
- Provides a consistent surface finish: You can choose matte, satin, or gloss depending on the look you want. Most pet figurines look best in satin—it has a natural, warm feel under your fingertips without the plastic-y sheen of high gloss.
Quality Control
Before a figurine ships, it goes through dimensional and visual inspection:
- Symmetry check: Ears should match. Eyes should be level. The base should be flat.
- Color accuracy: The figurine gets compared against the original reference photos under calibrated lighting. Does the red match? Is the urajiro cream warm enough?
- Surface inspection: Under raking light, the technician looks for support scars, bloom, uncured spots, or layer lines that are more prominent than expected.
- Fit and feel: The figurine should sit flat, feel solid, and have a pleasant weight and texture in hand.
What Your Photos Need to Show (And What Most Guides Get Wrong)
We've worked with thousands of pet families at this point, and here's the honest truth: the number one reason a figurine doesn't look "right" on the first preview isn't the sculptor's skill—it's the reference photos.
Most guides tell you to submit clear, well-lit photos. That's obvious. Here's what they don't tell you.
The Overlooked Angles
Everyone sends front-facing photos. Almost nobody sends these critical angles:
- Direct side profile: Nose to tail, camera at the dog's eye level. This is the single most important reference for body proportions.
- Top-down: Looking straight down at your dog from above. This shows ear spread, body width, and how the tail sits relative to the spine.
- Rear view: Yes, a photo of your dog's butt. The sculptor needs to see how the tail curls from behind, the width of the hindquarters, and the shape of the back legs.
- Close-up of the face in natural light: Not a flash photo, not a filtered selfie. Natural, diffused light (overcast day, near a window) shows true coat color and facial structure.
The Color Problem
Here's a counterintuitive insight that most pet owners never consider: your phone's camera is lying to you about your dog's color.
Modern smartphone cameras aggressively process images—auto-adjusting white balance, boosting saturation, applying computational photography tricks. A Shiba's coat might look bright orange on your phone but is actually a muted sesame in real life. The sculptor needs to know the true color, which is why photos taken in neutral, natural light without filters are essential.
If you want to go the extra mile, include a white piece of paper or a gray card in one of your reference shots. This gives the sculptor a known color reference point to calibrate against—the same trick professional photographers use.
| Photo Type | Why It Matters | Common Mistake |
|---|---|---|
| Side profile | Establishes body proportions | Taken from above, distorting leg length |
| Front face | Captures expression and ear set | Flash used, washing out color detail |
| Top-down | Shows ear spread and body width | Dog moving, creating motion blur |
| Rear view | Reveals tail curl and hindquarter shape | Rarely submitted at all |
| Natural light close-up | True color reference for digital file | Indoor tungsten lighting skews warm |
| Action/personality shot | Helps sculptor capture spirit and pose | Over-filtered or heavily edited |
The Personality Brief
Beyond photos, the best thing you can do is tell the sculptor about your dog's personality. This sounds fluffy, but it directly affects the sculpt. A confident, alert Shiba gets a different head angle and ear position than a relaxed, goofy one. Is your dog the type to stand at attention watching squirrels, or the type to lounge with one paw dangling off the couch? That information translates into pose, expression, and overall energy.
One order that stuck with us at PawSculpt involved a Shiba named Kiko whose owner described her as "perpetually unimpressed." The sculptor adjusted the brow ridge and mouth angle by fractions of a millimeter to capture that signature Shiba skepticism. The owner's response when she saw the preview: "That's her. That's exactly her face when I tell her it's bath time." That reaction doesn't come from technical skill alone—it comes from understanding the dog.
You can explore how to submit your own photos and personality notes through PawSculpt's ordering process to get a sense of what's involved.
The Preview Stage: What to Look For and How to Give Feedback
After the digital sculpt is complete, you'll typically receive a 3D preview render—a series of images showing the digital model from multiple angles before anything gets printed. This is your chance to request adjustments. But most people don't know what to look for beyond "does it look like my dog?"
Here's a practical checklist:
Silhouette Test
Open the preview image and squint. Blur your vision. Can you tell it's your specific dog from the silhouette alone? If the outline reads as "generic dog," the proportions need work. If it reads as "that's a Shiba, and specifically my Shiba," the blockout is solid.The 10-Foot Test
Shrink the preview image to thumbnail size on your screen. Does it still read clearly? A good figurine works at shelf distance (a few feet away) just as well as it does up close. If the expression disappears at small scale, the facial features may need to be slightly exaggerated for readability—a common and accepted practice in figurine design.Color Accuracy
Compare the preview render's colors to your unedited reference photos. Remember that screen calibration varies, so look at relative relationships rather than absolute matches. Is the red-to-cream transition in the right place? Is the nose the right shade of dark?Giving Useful Feedback
Instead of: "The face doesn't look right."
Try: "The muzzle looks slightly too long compared to the reference photo. Can we shorten it by about 10%? And the left ear seems to tilt outward a bit more than my dog's."
Specific, comparative feedback saves revision cycles. Reference your original photos. Point to exact areas. Use words like "wider," "narrower," "more upright," "slightly rounder." The sculptor is working in a 3D environment where every adjustment is measurable—give them something measurable to work with.
For details on how the preview and revision process works at PawSculpt, check the FAQ page for current information.
Caring for Your Finished Figurine
Your figurine arrives. You pull it from the packaging and feel the weight of it in your palm—heavier than you expected, with a smooth, slightly warm texture from the clear coat over fine resin grain. Now what?
Placement
- Avoid direct sunlight: Even with UV-resistant clear coat, prolonged direct sun exposure over months or years can gradually affect resin color. A bookshelf, mantel, or display cabinet away from windows is ideal.
- Stable surface: Resin is strong but can chip if knocked off a shelf onto a hard floor. A felt pad under the base adds grip and scratch protection for your furniture.
- Room temperature: Extreme heat (near a radiator, in a hot car) can soften resin. Extreme cold won't damage it but can make it more brittle temporarily.
Cleaning
- Dust with a soft, dry brush (a clean makeup brush works perfectly). The fine texture of 3D-printed resin can trap dust in micro-grooves.
- For deeper cleaning, a slightly damp microfiber cloth is fine. Avoid solvents, alcohol, or harsh chemicals—they can attack the clear coat or even the resin itself.
- Don't submerge in water. If the figurine has drain holes that were sealed, prolonged soaking could compromise the seal.
Long-Term Durability
Full-color resin figurines are durable display pieces, not toys. They'll last decades on a shelf with basic care. The clear coat may dull slightly over many years and can be refreshed with a new application if needed—though honestly, most people never need to.
"The best spot for a figurine is wherever you'll see it every day. Not hidden in a cabinet. Right there, at eye level, where it catches you off guard and makes you smile."
What Makes the Shiba Inu Figurine Process Different From Other Breeds
We get asked this a lot: does the breed really change the process? The answer is absolutely yes, and the Shiba Inu sits in a unique spot.
Compared to a Poodle (where the sculptor spends most of their time on elaborate coat geometry), a Shiba's challenge is subtlety. The coat is uniform enough that you can't hide proportional errors behind dramatic fur. Compared to a Bulldog (where the face is the star and the body is relatively simple), a Shiba demands equal attention everywhere—the face, the coat volume, the tail curl, the compact body, the alert stance.
Shibas also have a narrower "recognition window" than many breeds. A Golden Retriever figurine can be off by 15% on muzzle length and still read as a Golden. A Shiba that's off by 10% starts looking like an Akita or a generic spitz. The 3D sculpting dog work for this breed is essentially a precision exercise wrapped in soft, plush-looking fur.
And then there's the color. Shibas come in red, sesame, black and tan, and cream—and the transitions between colors (especially the urajiro markings) are gradual, not sharp. In a full-color 3D print, these gradients are handled through the digital color map applied to the 3D model. The sculptor essentially "paints" the digital file with precise color data, and the printer reproduces those colors voxel by voxel in resin. Getting the sesame overlay right—where individual dark-tipped hairs create a sable effect over a red base—is one of the most technically demanding color-mapping tasks in pet figurine work.
What to Expect: A General Timeline
Every custom figurine follows a general creative arc. Rather than quoting specific turnaround times (which can vary—check PawSculpt's website for current details), here's what the stages typically involve:
| Stage | What Happens | Your Role |
|---|---|---|
| Photo submission | You provide reference images and personality notes | Select diverse angles, natural lighting |
| Digital sculpting | Artist builds the 3D model from scratch | Wait for preview (this is the longest creative step) |
| Preview & revisions | You review renders and request changes | Give specific, measurable feedback |
| Print preparation | File is optimized for printing (orientation, supports, hollowing) | None—this is technical backend work |
| Full-color 3D printing | Model is printed layer by layer in full-color resin | None |
| Post-processing | Washing, curing, support removal, clear coat | None |
| Quality control & shipping | Final inspection and careful packaging | Receive and unbox your figurine |
The digital sculpting phase is typically the longest because it's where all the creative decision-making happens. The printing and post-processing, while precise, follow established technical protocols.
Bringing It Back to That Waiting Room
You're still sitting there, phone in hand, scrolling through photos of your Shiba. Maybe you're at the vet for a routine checkup, and everything's fine. Maybe it's something more serious, and you're holding onto these photos a little tighter than usual. Either way, you're looking at images that capture moments but not presence—not the weight of her leaning against your leg, not the texture of that ridiculous plush coat, not the way she holds her tail at exactly that angle when she's happy.
That's the gap that the entire digital sculpting pet figurine process exists to close. Not to replace a photo, but to give you something three-dimensional—something you can pick up, turn in your hands, and feel the heft of. Something that sits on your desk and catches the light differently every afternoon. Something that makes a visitor say, "Wait, is that her?"
The technology is remarkable—full-color resin printing that embeds pigment directly into the material, digital sculpting tools that let artists adjust a muzzle by fractions of a millimeter. But the technology is just the mechanism. The point is the dog. Your dog. The specific tilt of her head, the exact curl of her tail, the precise shade of red that your phone camera never quite gets right but that a skilled sculptor, working from your best reference photos, can nail.
If you've read this far, you're probably the kind of person who notices those details. Good. That's exactly the kind of person who ends up with a figurine that makes them tear up a little when they first hold it—not because it's sad, but because it's right.
Frequently Asked Questions
How long does a custom pet figurine take to make?
The timeline depends on the provider and their current workload. The digital sculpting phase—where the artist builds your pet's 3D model from scratch—is typically the longest step because it involves the most creative decision-making and revision cycles. Printing and post-processing follow more predictable timelines. For current turnaround estimates, check the provider's website directly.
What photos work best for a custom Shiba Inu figurine?
You want multiple angles in natural light without filters: side profile at eye level, front face, top-down, and a rear view showing the tail curl. Include at least one close-up of the face in diffused natural light for accurate color reference. Action shots and personality descriptions also help the sculptor capture your dog's spirit, not just their shape.
Are custom pet figurines hand-painted?
Not at PawSculpt. The figurines are produced through full-color resin 3D printing, where color pigments are embedded directly into the resin material during the printing process. There's no painting step at all. The only manual finishing is the application of a protective clear coat after printing and curing.
How durable are 3D printed resin pet figurines?
They're designed as display pieces and will last decades with basic care. The resin is solid and the embedded color won't flake or peel like surface coatings can. Keep them out of direct prolonged sunlight, away from extreme heat, and on a stable surface. Dust with a soft dry brush; clean with a slightly damp microfiber cloth if needed.
Can you make a figurine of a pet that has passed away?
Yes—and this is one of the most common and meaningful use cases. Since the entire process is based on reference photos, your pet doesn't need to be present. The key is providing the best photos you have: multiple angles, natural light, and as much detail as possible about their coloring, markings, and personality.
What makes Shiba Inu figurines harder to sculpt than other breeds?
Shibas have a narrow recognition window—small proportional errors can make the figurine look like an Akita or generic spitz instead of a Shiba. Their dense double coat lacks dramatic texture features, so the sculptor can't hide mistakes behind flowing fur. And the urajiro color transitions require precise gradient mapping in the digital file to look natural in the final full-color print.
Ready to Celebrate Your Shiba?
Every Shiba Inu has a personality that's bigger than any photograph can hold—the stubborn independence, the dramatic side-eye, the tail that curls just so. A custom PawSculpt figurine captures the specific details of digital sculpting pet figurine craftsmanship: your dog's exact proportions, true coat colors, and the expression that makes everyone who meets them say, "That dog has opinions."
Visit pawsculpt.com to see the full process, photo guidelines, and current service details
