For the Labradoodle Lover: 5 Color-Matching Secrets to Get That Multi-Toned Coat Right in Resin
You’re standing in the aisle of the local pet store, holding a "Golden Retriever" plush toy next to your Labradoodle, realizing with sinking certainty that the generic "gold" fabric looks absolutely nothing like the complex, shifting shades of apricot and cream rippling through your dog’s coat.
Quick Takeaways
- Lighting changes everything — Indoor "warm" bulbs turn cream Doodles yellow; always photograph under natural overcast skies.
- Roots define the shade — Doodles often have lighter roots; we need photos of the fur parted to the skin to get the depth right.
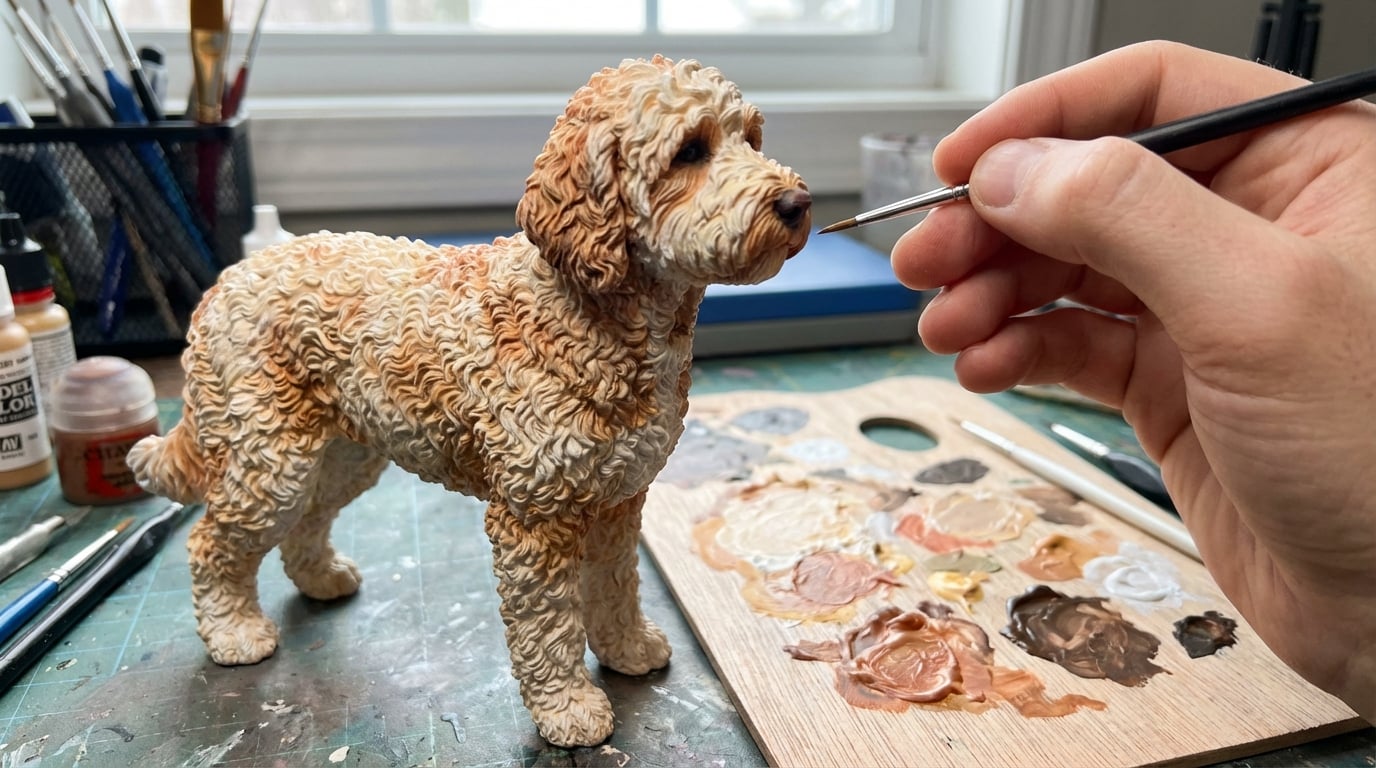
- Texture creates color — In 3D printing, physical shadows from the sculpted curls create the final color perception, not just the pigment.
- Wet vs. Dry — Never photograph a wet Doodle for reference; water darkens the coat and clumps the geometry, distorting the digital sculpt.
The "Chameleon Coat" Problem: Why Doodles Are the Hardest to Model
I’ve been in additive manufacturing for over a decade. I’ve overseen the production of intricate aerospace prototypes and architectural models. But ask any veteran digital sculptor or print engineer what keeps them up at night, and they’ll tell you: It’s the Labradoodle coat.
Here is the brutal reality of the shop floor. Most dog breeds have a primary coat color. A Rottweiler is black and tan. A Dalmatian is white with black spots. But a Labradoodle? A Labradoodle is a optical illusion held together by curls.
- Pigment density (the actual color of the hair strand).
- Structural geometry (how the light bounces off the tight curls or loose waves).
- Subsurface scattering (how light penetrates the fluffy undercoat and bounces back).
When we create a custom pet figurine, we aren't painting a surface. We are using full-color resin 3D printing. This means we are jetting microscopic droplets of cyan, magenta, yellow, black, white, and clear resin to build the object voxel by voxel (think of a voxel as a 3D pixel).
If we just pick one shade of "brown" and print it, your figurine will look like a chocolate bar, not a dog. To get it right, we have to engineer the color into the texture.
This guide isn't about "artistic interpretation." It’s about the physics of light and resin. If you want a replica that actually looks like your dog, you need to understand how we translate fur into data.
1. The "5000K" Rule: Why Your Indoor Photos Are Lying
The biggest failure mode we see in the lab starts before we even open the 3D modeling software. It starts with the reference photos.
Most homes are lit with "soft white" bulbs, which have a color temperature of around 2700 Kelvin. This light is yellow. If you have an apricot, cream, or red Labradoodle, that yellow light artificially saturates the coat. It makes a pale cream dog look like a golden apricot. It makes a red dog look muddy orange.
Conversely, if you take a photo in open shade on a sunny day, the ambient light is blue (roughly 7000K). This sucks the warmth out of a chocolate Labradoodle, making them look dull and grayish.
The Fix: The Grey Card Method (Or the Poor Man's Version)
We need to calibrate the color values in our digital sculpting software.- Take your dog outside on an overcast day (clouds act as a giant soft-box diffuser).
- If you can, place a sheet of standard white printer paper next to the dog’s face in the photo.
- When our digital artists look at that photo, they can "white balance" the image. They tell the software, "This paper is True White." The software then shifts all other colors accordingly, revealing the true pigment of your dog’s fur.
"We can sculpt the perfect curl, but if the color data is wrong, the eye rejects the whole object. Lighting isn't a suggestion; it's the blueprint."
2. The "Root Check": Depth is More Than Skin Deep
A Labradoodle coat is rarely a single solid color from root to tip. This is especially true for dogs with the "fading gene" (common in Poodles) or sun-bleached tips.
In 90% of the Doodles we process, the tips of the fur are significantly lighter than the roots, or vice versa.
- Sun-bleaching: A chocolate Doodle often has reddish/bronze tips but dark brown roots.
- Clearing: A puppy born black might be clearing to silver or blue, resulting in a dog that looks charcoal but has slate-grey roots.
The Manufacturing Conundrum
If we print the figurine using only the color on the surface of your photos, the result looks flat. It looks like a toy. Real fur has depth because you catch glimpses of the darker (or lighter) roots as the animal moves.The Actionable Step:
We need a "parted" photo. Literally take your hands, part the fur on the dog's shoulder and back, and take a close-up photo of the skin and roots.
When our artists digitally sculpt the model, they use a technique called Vertex Painting. They can actually paint a darker color into the "valleys" of the 3D mesh (the roots) and a lighter color onto the "peaks" (the tips). When the 3D printer lays down the resin, it physically prints those gradients. The result? A figurine that seems to shimmer and shift color depending on how you hold it, just like the real dog.
3. Texture Is Color: The Geometry of the Curl
This is the most counterintuitive part of the process, but as an engineer, it’s my favorite.
In the world of 3D printing, texture dictates color perception.
Imagine a flat sheet of grey plastic. It looks grey. Now, imagine a sheet of that same grey plastic, but it’s covered in tiny, chaotic pyramids. It will look significantly darker. Why? Because the geometry traps light. Shadows form between the pyramids.
Labradoodles come in three main coat textures, and each requires a different digital sculpting approach to get the color right:
| Coat Type | Characteristics | 3D Printing Challenge | The Color Shift Effect |
|---|---|---|---|
| The Wool Coat | Tight curls (Poodle-like). Dense. | High surface area creates deep shadows. | Prints Darker. We must digitally lighten the pigment slightly to compensate for the shadows trapped in the printed curls. |
| The Fleece Coat | Loose, flowing waves. Soft. | Requires "soft" transitions in the mesh. | True to Tone. The gentle waves reflect light evenly, so the printed color is usually accurate to the file. |
| The Hair Coat | Straighter, scruffy, wispy. | Thin geometry is fragile; requires "thickening." | Prints Lighter. Thin structures let light pass through the resin (subsurface scattering), making the color appear washed out. |
The "Wet Dog" Mistake
Never, ever send us a photo of your dog when they are wet or even damp. Water clumps the fur, destroying the texture information. If we sculpt based on a wet dog, we are sculpting "clumps," not curls. This changes the shadow values. A wet dog looks darker. If we print that color, your dry figurine will look like it was dipped in oil.4. The Nose & Eye Halo: The Detail That Sells the Illusion
If you look closely at your Labradoodle’s face, specifically around the eyes and nose, you’ll notice the color isn't uniform.
- The Eye Halo: Most Doodles have distinct skin pigmentation around the eye rims. In lighter dogs (creams/apricots), this might be a dark liver or black ring. In chocolate dogs, it might be a lighter tan skin tone showing through thinning hair.
- The Nose Fade: Many Doodles have what we call a "snow nose" or aging fade, where the center of the black nose turns pinkish or brown.
Why This Matters for Resin
Our PolyJet/MJF-style printers have a resolution often in the 25–50 micron range. That is incredibly fine—finer than a human hair. We can print that tiny ring of skin around the eye.But we can only print it if we know it's there.
Many owners send photos taken from 5 feet away. At that distance, the eye is just a dark pixel. The artist will sculpt a generic dark eye. The result is a "dead" stare.
The Fix: Get in close. Macro close. We need to see the transition where the fur meets the nose leather. We need to see the color of the eyelashes (which are often a different color than the coat). These micro-details are what trigger the "recognition response" in your brain. When you open the box, you shouldn't say, "That's a nice dog." You should say, "That’s my dog."
5. The Resin Reality: Clear Coats and Saturation
Here is a piece of insider knowledge that almost no one talks about outside the factory floor.
When a full-color 3D print comes out of the machine, it has a matte, almost chalky finish. The colors look desaturated. To protect the material and bring the colors to life, we apply a UV-resistant Clear Coat (a specific type of varnish).
The Clear Coat Effect:
Applying clear coat is like wetting a stone. It instantly deepens the contrast and saturates the colors.
- Reds become bolder.
- Blacks become deeper (moving from dark grey to true black).
- Creams can pick up a slight yellow warmth.
Our digital artists anticipate this. They actually sculpt and color the digital model slightly lighter and less saturated than the real dog, knowing that the post-processing clear coat will darken it to the correct shade.
Why this matters to you:
If you look at the digital preview we send you (the 3D render on your screen) and think, "Hmm, he looks a tiny bit pale," trust the process. That is intentional. If the digital render looks perfectly dark and saturated on a glowing computer screen, the physical resin object—once cured and coated—might end up looking too dark.
"We aren't just matching a Pantone chip. We are engineering a physical object to interact with light the same way your dog's fur does."
— The PawSculpt Team
The "Black Dog" Paradox
I need to dedicate a specific section to black Labradoodles. They are, without a doubt, the hardest to capture.
In a photograph, a black dog often looks like a silhouette. You can’t see the muscle definition, the direction of the curls, or the expression. It’s just a black void.
If we print a "black void," you get a lump of black resin.
To make a black Labradoodle figurine look real, we actually don't print it purely black. We print it in very dark charcoal grey with hints of midnight blue or warm brown (depending on the dog's undertones).
Why? Because in the real world, "black" is defined by the highlights reflecting off it. By lifting the base color slightly, we allow the physical shadows of the 3D printed curls to create the "true black" in the crevices, while the tips catch the light.
Action Item for Black Doodle Owners:
When taking photos, overexpose them slightly. You want the photo to look washed out. We need to see the structure of the curls. We can darken the color digitally, but we cannot invent the texture if the photo is just a black blob.
Common Failure Modes (And How to Avoid Them)
In our years of running these machines, we’ve seen patterns in what makes a project stall or fail.
1. The "Instagram Filter" Trap
Please, for the love of engineering, do not send us photos with filters. "Valencia" or "Clarendon" might make your dog look cute on social media, but they destroy color data. They tint shadows blue and highlights yellow. Send the raw, ugly, unedited files.2. The "Portrait Mode" Blur
Phone cameras have "Portrait Mode" that artificially blurs the background. The problem? It often blurs the edges of the dog’s ears and the wisps of fur on the head. We need those wisps. That’s the "Doodle look." Turn off portrait mode. We want sharp focus on the edges.3. The "Top-Down" Perspective
You see your dog mostly from above (looking down at them). But a figurine sits on a shelf at eye level. If you only send top-down photos, we have to guess what their chest and chin look like. Get on the floor. Take photos from the dog’s eye level.A Note on "Parti" and "Merle" Patterns
If your Doodle is a Parti (white with patches) or a Merle (mottled patches), you have a unique challenge.
In traditional hand-painting (which we do not do), an artist looks at a photo and dabs paint where the spot is. It’s an approximation.
In full-color 3D printing, we take your photos and "wrap" them around the digital 3D model like a skin. This is a process called UV Mapping. For complex patterns, we need to know exactly where the white stops and the color starts.
- The Connection Points: We need photos that show how the patterns connect. Don't just show the left side and the right side. Show the spine. Show the belly. If a black patch wraps from the shoulder over to the neck, we need to see that bridge. Otherwise, the artist has to guess, and the spot might end up in the wrong place.
The Emotional Weight of Accuracy
Why do we obsess over microns and kelvin temperatures? Why do I write 3,000 words on lighting conditions?
Because a custom figurine isn't just a piece of plastic. Usually, it’s a vessel for memory.
We work with many clients who are memorializing a pet that has passed. In those moments, the brain is searching for the familiar. If the color is slightly off, or the texture is too smooth, the brain registers it as "toy." But when the light hits those printed curls just right, and the specific shade of apricot matches the memory of the dog sleeping in the sun... that’s when the object transcends its materials.
We use industrial-grade technology, but the goal is deeply human. We want to give you something that feels true.
Frequently Asked Questions
How do you get the curls to look real on the figurine?
We don't use generic "curly dog" models. Our artists digitally sculpt the fur strands individually using software like ZBrush. We match the specific tightness and direction of your dog's coat (fleece, wool, or hair). The high-resolution 3D printer then builds these tiny geometries layer by layer.Can you fix the color if my photos aren't perfect?
We can do a lot of correction. If you tell us, "The photo makes him look orange, but he's actually a cool cream," we can shift the color values in the digital file. However, the best results always come from accurate source data (photos taken in natural light).Do you hand-paint the markings on the figurine?
No, and this is a key differentiator. We use full-color 3D printing. The machine jets colored resin directly. This allows us to achieve soft gradients (like the fading on a puppy's ears) that are nearly impossible to replicate with a brush without looking streaky.My Doodle changes color in summer and winter. Which should I choose?
This is common! We recommend choosing the "era" of your dog you want to commemorate. Don't try to mix a "summer cut" body shape with "winter coat" colors. Pick a set of photos from one specific time period to ensure the anatomy and color match perfectly.Ready to Celebrate Your Pet?
Every pet has a story worth preserving. Whether you're honoring a beloved companion who's crossed the rainbow bridge or celebrating your furry friend's unique personality, a custom PawSculpt figurine captures those details that make your pet one-of-a-kind.
Free instant AI preview • 3D artist preview within 7 days • 5 free revisions
