Your Norwegian Forest Cat's Coat Isn't 'Too Complicated' — Here's How Full-Color 3D Printing Captures Every Layer
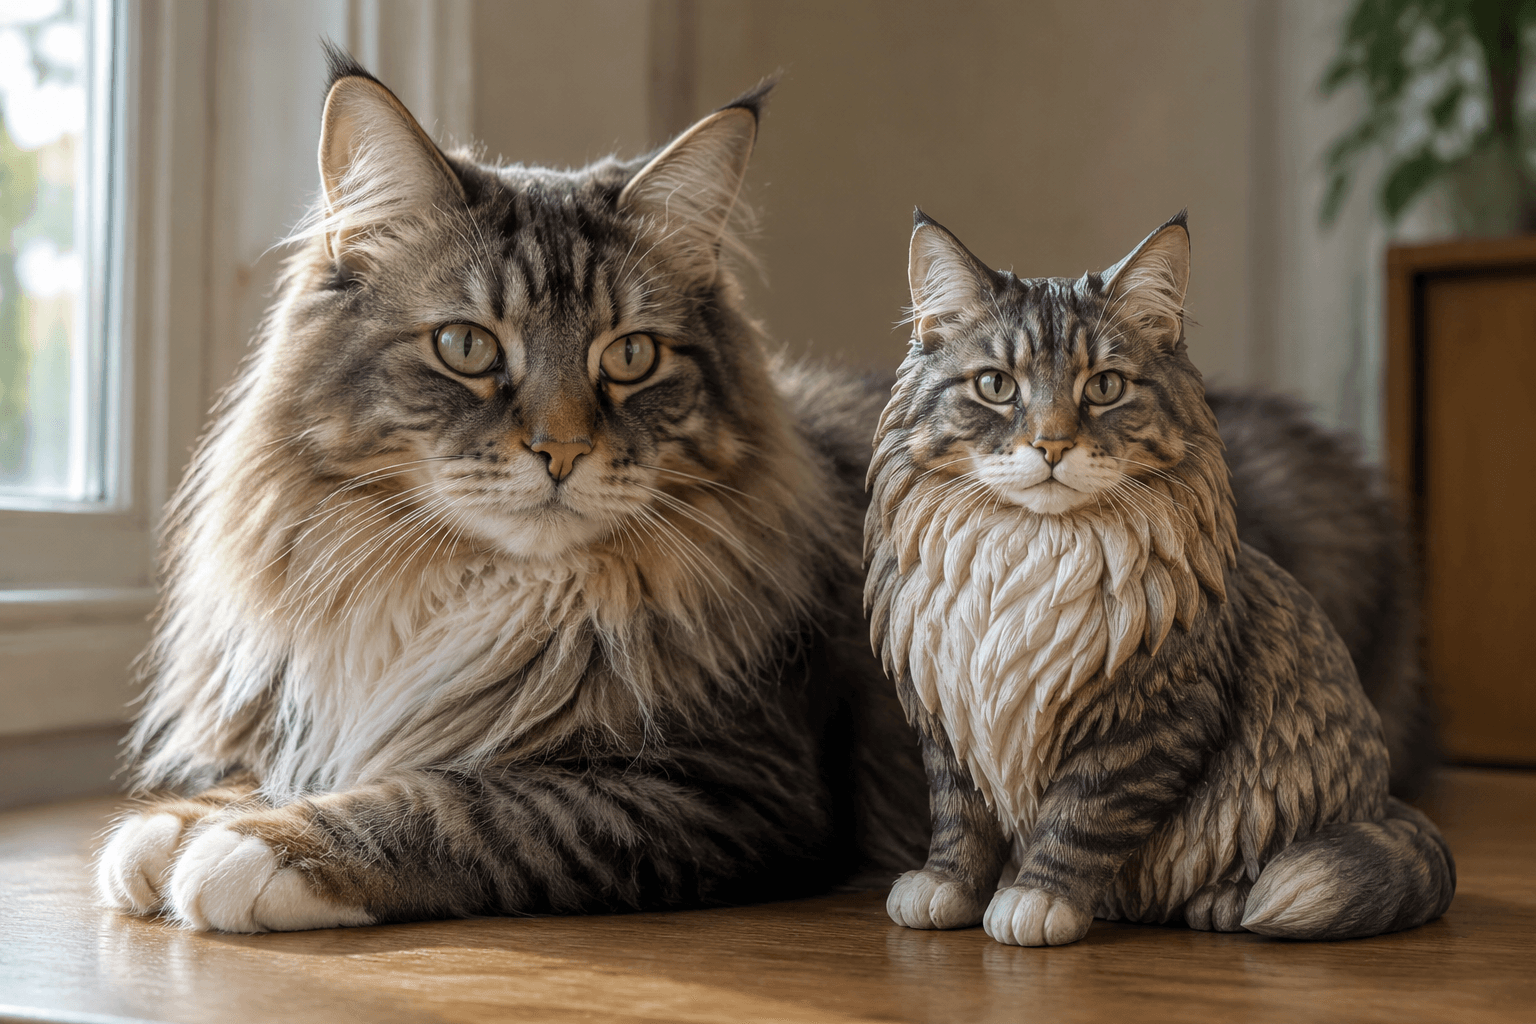
A 2022 survey by the Cat Fanciers' Association found that Norwegian Forest Cat owners are3.4 times more likely than other breed owners to say their cat's coat is "impossible to capture in a photo"—let alone a Norwegian Forest Cat figurine. That number stuck with us, because we hear some version of it every week: the triple-layered ruff, the ticked guard hairs catching afternoon light like copper filament, the way the undercoat shifts from slate to cream depending on the season. Most people assume that complexity is a barrier. It isn't. It's actually the reason full-color 3D printing exists.
Quick Takeaways
- A Norwegian Forest Cat's coat has three distinct layers — and each one requires a different digital sculpting strategy to reproduce faithfully
- Full-color 3D printing embeds pigment directly into resin — no painting step means no lost detail between color and form
- Photo angle matters more than camera quality — five specific reference shots unlock90% of your cat's coat accuracy
- The clear coat finish changes how light interacts with the figurine — explore PawSculpt's full-color process to see how this mimics real fur sheen
- Counterintuitive fact: simpler poses often capture more coat detail — busy action poses can hide the very features that make your Wegie unique
The Three-Layer Problem (And Why Most Approaches Fail)
Here's the thing about a Norwegian Forest Cat's coat that even longtime owners don't fully articulate: it isn't one coat. It's three coats occupying the same space, each with different optical properties.
Layer one: the dense, wooly undercoat. It's thermal engine—short, crimped fibers that trap air. Visually, it reads as a soft, muted base color. On a silver taby Wegie, this might be pale dove gray. On a red, it's a washed-out apricot.
Layer two: the intermediate awn hairs. These are the forgotten middle children of cat fur. They're thinner than guard hairs but longer than undercoat, and they carry most of the ticking—those alternating bands of color along a single strand that give Norwegian Forest Cats their depth.
Layer three: the long, glossy guard hairs. These are the showstoppers. They're water-resistant, they catch light, and they create the dramatic ruff, britches, and tail plume that define the breed's silhouette.
Now, here's why this matters for anyone wanting a custom cat sculpture with unusual coloring: traditional figurine approaches—whether mass-produced resin castings or even skilled miniature work—collapse these three layers into a single surface treatment. You get one color. Maybe a wash or a drybrush to suggest depth. But the actual optical interplay between layers? Gone.
Full-color 3D printing solves this differently. Because color is deposited voxel by voxel (a voxel is essentially a 3D pixel—a tiny cube of colored resin), our digital sculptors can encode different color information at different depths of the surface texture. The undercoat color shows through in the carved valleys between fur clumps. The guard hair color sits on the raised ridges. The ticking gets represented through micro-gradients along each sculpted strand group.
It's not magic. It's spatial color logic applied at resolution often in the 25–50 micron range (about half the width of a human hair per layer).
| Coat Layer | Visual Role | How It's Captured Digitally |
|---|---|---|
| Undercoat (wooly base) | Muted base tone, visible in partings | Color mapped to recessed geometry between fur clumps |
| Awn hairs (middle layer) | Ticking, color banding, depth | Micro-gradient color transitions along strand groups |
| Guard hairs (outer layer) | Gloss, silhouette, dramatic flow | Raised surface geometry with directional color shifts |
"We treat every Norwegian Forest Cat coat like a landscape—there's a foreground, a midground, and a background, all happening in two inches of fur."
— The PawSculpt Team

Why Your Photos Are Better Than You Think (The Reference Shot Framework)
Most owners who contact us about a long coat cat3D print start with an apology. "Sorry, my photos aren't great." "She never sits still." "The lighting in my apartment is terrible."
We'll be real: we've worked from blurry phone shots taken in dim kitchens and still produced figurines that made people cry (in the good way). The reason isn't that we're guessing—it's that we know which information to extract from imperfect images.
Here's the framework our digital sculptors actually use:
The Five Sacred Angles
- Direct profile (left or right side) — This gives us body proportions, ear set, tail cariage, and the overall silhouette of the coat. For Wegies, this is where we see how the britches hang and where the ruff begins.
- Three-quarter front — The money shot for facial structure. We need to see how the earufts relate to the chekbone ruff, and how the bib falls across the chest.
- Direct front face — Ear spacing, eye shape and color, nose leather color, and the symmetry (or charming asymmetry) of facial markings.
- Top-down back view — This one surprises people. It shows us the coat's color map from above—where the taby stripes break, where white patches begin, how the tail plume fans.
- Tail detail — Norwegian Forest Cats have tails that deserve their own zip code. We need to see the plume's fullness, color gradation, and how it's typically carried.
What Matters More Than Camera Quality
The counterintuitive insight here: natural, diffused light beats any expensive camera. A phone photo taken near a window on an overcast day gives us more usable color data than a DSLR shot with harsh flash. Why? Flash creates specular highlights on guard hairs that blow out the color information. Diffused light lets us see the actual pigment.
One order that stuck with us: a family sent photos of their silver classic tabby Wegie taken on a beach—overcast Pacific Northwest morning, soft gray light everywhere. Those images were extraordinary for our purposes. The even illumination revealed every color transition in the coat without a single hot spot. The sand provided a neutral background that didn't cast color onto the fur.
If you're reading this thinking about your own cat, here's the practical takeaway: cloudy days are your friend. Take your cat near a large window or (if they're harness-trained) outside on an overcast afternoon. Skip the golden hour glamour shots—they're beautiful for Instagram but they shift every color warm.
| Photo Factor | What Helps Us | What Hurts Us |
|---|---|---|
| Lighting | Diffused natural light, overcast | Direct flash, harsh shadows, golden hour color cast |
| Background | Neutral (gray, white, beige) | Colorful surfaces that reflect onto fur |
| Distance | Close enough to see individual fur clumps | So close it's blurry, or so far coat is a blob |
| Cat's state | Relaxed, natural posture | Mid-motion blur, compressed/flattened coat |
| Quantity | 10-20 varied angles | 3nearly identical shots from the same position |
The Digital Sculpting Process: From Pixel to Presence
This is where the spiritual dimension of what we do becomes most visible. A photograph is flat. A figurine occupies space. Bridging that gap isn't just a technical exercise—it's an act of translation between dimensions, a kind of ritual where a digital artist sits with your cat's images and slowly conjures their presence into three-dimensional form.
How a3D Artist "Reads" a Norwegian Forest Cat
Our sculptors work in software like ZBrush or Blender, building the figurine polygon by polygon. But before they touch a digital tool, they study. They're looking for what we internally call the cat's gestural signature—the pose, the weight distribution, the attitude that makes your cat yours and not just any Norwegian Forest Cat.
For Wegies specifically, the sculptural challenges are unique:
- Volume vs. structure: That massive coat hides the actual body underneath. A skilled sculptor needs to understand feline anatomy well enough to infer where the shoulder blade sits under three inches of fluff, so the pose reads as physically plausible.
- Fur flow direction: Norwegian Forest Cat fur doesn't just hang. It flows in specific patterns—backward from the face, downward on the chest bib, outward on the britches, and in a dramatic cascade on the tail. Getting these directional flows wrong makes the figurine feel "off" even if the color is perfect.
- Proportional checks: Wegies are large, sturdy cats with a distinctive triangular head shape and straight nose profile. Our artists overlay reference grids on your photos to ensure the head-to-body ratio, leg length, and ear placement match your specific cat—not just breed standard proportions.
The Coat Texture Sculpting Pass
After the base anatomy is blocked in, there's a dedicated pass just for fur texture. This is where the three-layer problem gets solved geometrically.
The sculptor carves fur clump groups into the surface—not individual hairs (that would require billions of polygons and wouldn't print well), but clusters that read as natural fur groupings. For a Norwegian Forest Cat, these clusters are larger and more flowing than they'd be for, say, a British Shorthair. The ruff gets deep, dramatic separations. The body coat gets medium-depth groves. The face gets the finest, tightest texture work.
Here's a failure mode we learned the hard way early on: if you sculpt fur texture too deep on a small figurine, the recesses become traps during printing. Uncured resin pools in those valleys, and you get a sticky, discolored mess after UV curing. The solution is calibrating texture depth to figurine scale—deeper groves for larger pieces, shallower relief for smaller ones. It's a tradeoff between visual drama and printability.
"A coat that complex isn't a problem to solve—it's a sacred text to translate."
Color Mapping: Where the Magic Gets Technical
Once the geometry is finalized, the model gets UV unwrapped—imagine peling the 3D surface flat like unwrapping a gift, so you can paint a2D texture map that wraps back onto the 3D form perfectly. This texture map is where every color decision lives.
For a Norwegian Forest Cat with, say, a brown classic tabby pattern with white:
- The broad taby swirls get mapped with their exact color from your photos—not a generic "brown taby" preset, but the specific warm chocolate or cool ash-brown of your cat
- White areas get their actual boundaries traced, including those irregular edges where white meets color (no two cats have the same white distribution)
- The nose leather, paw pads, and eye color each get individual attention
- Ticking along guard hairs gets represented through gradient transitions in the texture
This texture map is what the3D printer reads when depositing colored resin. Every voxel of material gets assigned its color from this map. The result: color that is literally part of the figurine's substance, not sitting on top of it.
Full-Color 3D Printing: The Process That Makes "Too Complicated" Irrelevant
Let's get into the actual printing, because this is where the Norwegian Forest Cat's complexity stops being a liability and becomes an asset.
How Full-Color Resin Printing Works
The printer deposits UV-curable photopolymer resin in microscopically thin layers—typically 25–50 microns per layer. At each layer, multiple print heads deposit different colored resins simultaneously, mixing them at the voxel level to achieve the target color. Think of it like a color inkjet printer, but instead of spraying onto flat paper, it's building up a solid object layer by layer.
For a Norwegian Forest Cat figurine, this means:
- The subtle shift from warm cream undercoat to cool silver guard hairs? That's a gradient happening across maybe 10–20 voxels of depth.
- The sharp boundary where a white chest bib meets taby flanks? That's a hard color transition at a specific XYZ coordinate.
- The green-gold of the eyes? That's a tiny cluster of precisely colored voxels with a slightly different surface finish after clear coating.
Orientation Logic (Why Your Cat Might Print Upside Down)
Here's something most people never think about: the orientation of the model on the build plate dramatically affects quality. Our print technicians choose orientation based on several factors:
- Minimizing support contact on visible surfaces: Supports (temporary scaffolding that holds overhanging geometry during printing) leave tiny marks where they attach. We orient the model so supports touch the least visible areas—typically the underside of the base or the bottom of the belly.
- Avoiding suction-cup effects: Large flat areas parallel to the build plate can create suction forces during printing that cause warping or layer separation. A Norwegian Forest Cat's broad, fluffy tail held flat? That's a suction risk. We might angle the whole model 15–30 degrees to break up those flat zones.
- Optimizing fur texture resolution: Fur detail that runs parallel to the layer lines prints more crisply than detail perpendicular to them. Since most Wegie fur flows downward, we often orient the model so the build direction aligns with gravity—meaning the fur texture gets maximum resolution.
Post-Processing: The Clear Coat Ritual
After printing, the figurine goes through several steps:
- Washing: Removing uncured resin from surface details (those fur texture groves need to be clean and open)
- UV curing: Final hardening of the resin under controlled UV exposure. Over-curing makes the piece brittle and can yellow whites. Under-curing leaves the surface tacky. It's a calibrated window.
- Support removal: Carefully clipping and sanding where supports attached. On a Norwegian Forest Cat figurine, we plan support placement so any remaining marks hide in natural fur partings.
- Surface inspection: Checking under raking light (light held at a steep angle to the surface) to reveal any imperfections, uncured spots, or support scars that need attention.
- Clear coat application: This is the only manual finishing step. A protective clear coat gets applied that serves two purposes: UV protection for the colored resin (preventing fading over time) and a controlled sheen that mimics the way light plays across real fur.
The clear coat step is actually where a Norwegian Forest Cat figurine gets its final character. A matte coat makes the piece look soft and natural—like you're seeing the cat in diffused light. A satin coat adds just enough sheen to suggest those glossy guard hairs catching light. We typically use satin for Wegies because it honors the breed's naturally lustrous outer coat.
| Post-Processing Stage | Duration (Typical) | What Can Go Wrong | How We Prevent It |
|---|---|---|---|
| Washing | Minutes | Residue in deep fur grooves | Multiple wash cycles, ultrasonic agitation |
| UV Curing | Calibrated exposure | Yellowing of whites, brittleness | Controlled time/intensity, test pieces |
| Support Removal | Careful manual work | Visible scars on coat texture | Strategic placement in hidden areas |
| Surface Inspection | Under raking light | Missed imperfections | Multiple angles, consistent protocol |
| Clear Coat | Thin, even layers | Pooling in recesses, uneven sheen | Controlled application, proper drying |
What We Wish Knew Sooner
A Sidebar From the Team
Look, we've been doing this long enough to have a collection of hard-won lessons. Here are the ones most relevant to Norwegian Forest Cat owners considering a full color 3D printed pet figurine:
The "winter coat vs. summer coat" problem is real. Wegies blow their undercoat seasonally, and they can look like two completely different cats in January versus July. If you want the full dramatic ruff and britches, send winter photos. If you prefer the sleker summer look, send those. But don't mix seasons in your reference shots—it confuses the proportional logic.
Solid white Norwegian Forest Cats are harder thanabbies. This surprises people. You'd think a single-color cat would be simpler. But white cats rely entirely on form, shadow, and subtle warm/cool shifts to read as three-dimensional. There's no pattern to "carry" the eye across the surface. Our sculptors spend extra time on fur texture depth for white Wegies because the geometry has to do all the visual work.
The tail is almost always the most fragile element. That magnificent plume, when translated to a figurine, creates a thin extension of resin that's vulnerable to snapping if dropped. We typically design the tail with internal structural considerations—thickening the base slightly, curving it close to the body or base for support. If your cat carries their tail straight up like a flag, we'll discuss options for making that work structurally.
Ear tufts and lynx tips print beautifully—but they're delicate. Those characteristic pointed ear furnishings that Norwegian Forest Cats sport? They translate to thin resin points. We reinforce them slightly in the digital model (adding maybe 10–15% more thickness than literal scale would suggest) so they survive handling without looking chunky.
The Spiritual Geometry of Capturing Presence
There's a moment in every project—somewhere between the third and fifth revision of the digital sculpt—where the figurine stops being a collection of polygons and starts being the cat. Our team talks about this shift like it's a threshold crossing. One minute you're looking at a 3D model. The next, you're looking at someone's companion.
We don't fully understand what triggers it. Sometimes it's getting the ear angle right—the way one ear tilts slightly forward while the other stays neutral, a posture that means "I hear you but I'm pretending I don't." Sometimes it's the weight distribution—the way a Norwegian Forest Cat settles their considerable mass onto their haunches with that particular regal patience.
Whatever it is, it's the moment the figurine becomes a vessel for presence. Not a replica. Not a copy. A sacred object that holds the energy of a bond.
This is why we push back when customers say "just make it look like the breed standard." Your cat isn't the breed standard. Your cat is the specific creature who sleps on your pillow, who chirps at birds through the window, who drapes their impossible tail across your keyboard at the worst possible moment. That specificity—those tiny deviations from "standard"—is exactly what makes a figurine feel like a spiritual anchor rather than a decorative object.
"The goal isn't a perfect cat. It's your perfect cat—every asymetry, every quirk, every sacred imperfection."
Some families tell us they place the finished figurine in a specific spot—a windowsill where their cat used to sit, a shelf at eye level where they can catch it in peripheral vision. They describe it as maintaining a presence in the home. The cat's energy, held in form. A legacy made tangible.
For those honoring a cat who has crossed over, this matters enormously. Grief needs something to hold. Memory needs a physical anchor. A full-color figurine that captures the exact copper-and-cream of your Wegie's coat, the precise green of their eyes, the characteristic way they tucked one paw under their chest—it becomes a ritual object. A place where love lands.
Common Concerns (And Honest Answers)
"Won't the long fur just look like a blob?"
This is the most common fear, and it's understandable. Long-haired cats photographed from a distance can look like fluffy clouds with faces. But here's the counterintuitive truth: long coats actually give our sculptors more to work with, not less.
Short-haired cats require extremely subtle surface texture to avoid looking like smooth plastic. But a Norwegian Forest Cat's dramatic fur groupings—the separated ruff sections, the flowing britches, the plumed tail—create bold, readable geometry that translates powerfully to a 3D printed figurine even at smaller scales.
"My cat is a weird color that doesn't match any breed description."
Good Seriously—good. The cats that challenge us most aren't the unusual ones; they're the ones that look exactly like every other cat of their color. A Norwegian Forest Cat with an unusual amber undercoat, or asymetrical white markings, or that rare cinnamon coloring? Those distinctive features give the figurine immediate recognizability. You'll look at it and know it's your cat, not just a Norwegian Forest Cat.
"What about the color accuracy? My cat looks different in every photo."
This is where the reference photo framework matters most. We don't match color to a single photo—we triangulate across multiple images to find the true color that your eye recognizes as correct. Your brain knows what color your cat is, even if your camera disagrees from shot to shot. We work with you during the preview stage to dial in that perceptual truth.
For specifics on how the preview and revision process works, visit our FAQ page—the details there stay current as our process evolves.
Caring for Your Finished Figurine
Full-color resin with a clear coat is more durable than people expect, but it's not indestructible. Here's what actually matters for longevity:
- Keep it out of direct, prolonged sunlight. The clear coat provides UV resistance, but no coating is infinite. A windowsill that gets 8 hours of direct sun daily will eventually affect vibrancy over years. Indirect light or a few hours of direct light? Perfectly fine.
- Dust with a soft brush, not a damp cloth. The fur texture creates tiny recesses that can trap moisture if you wipe with a wet cloth. A soft makeup brush or camera lens brush works perfectly for getting into those grooves.
- Handle the base, not the extremities. Tails, ear tufts, and extended paws are the most vulnerable points. Pick up the figurine by its base or body, not by protruding features.
- Temperature stability matters. Resin doesn't love rapid temperature swings. Don't store it in an atic that hits 120°F in summer or a garage that drops below freezing. Normal indoor temperatures are ideal.
If something does break—a tail tip snaps, an ear tuft chips—reach out to our team. Resin repairs are possible, and we'd rather help you fix a beloved piece than have you live with damage.
The Comparison Nobody Makes: Digital Sculpture vs. Physical Sculpture
Most articles comparing pet figurine options pit mass-produced resin castings against "custom" options without explaining what "custom" actually means in different contexts. Here's the breakdown that matters:
Mass-produced breed figurines: These are created from a single master sculpt (usually one "ideal" representative of the breed), then mold-cast hundreds or thousands of times. They look like a Norwegian Forest Cat. They will never look like your Norwegian Forest Cat. The color is typically a generic breed-standard palette applied uniformly.
Traditional commissioned sculpture (clay, then cast): An artist physically sculpts your cat in clay, makes a mold, casts it in resin, then paints it. This can be extraordinary work, but it's limited by human hand steadiness for fine detail, and the painting step introduces a layer of interpretation between the sculpted form and the final color.
Full-color 3D printed custom figurine (what we do): Your cat is digitally sculpted with reference to your specific photos, then printed with color embedded in the material itself. The color is the form. There's no gap between shape and pigment—they're created simultaneously, from the same digital source file.
The tradeoff? Traditional hand-sculpted pieces can achieve a certain organic warmth in their surfaces—the slight irregularity of human touch. 3D printed pieces have a different character: precision, consistency, and color accuracy that's mathematically derived from your photos. Neither is "better." They're different spiritual containers for the same love.
| Approach | Color Method | Customization Level | Coat Detail Capability | Consistency |
|---|---|---|---|---|
| Mass-produced cast | Generic paint scheme | None (breed standard only) | Low (single master sculpt) | High (identical copies) |
| Traditional commission | Applied after sculpting | High (artist interprets photos) | High (depends on artist skill) | Variable (human factors) |
| Full-color 3D print | Embedded in material during printing | High (digital sculpt from your photos) | Very high (voxel-level color control) | High (digital precision) |
Closing: The Light That Stays
We started with a statistic—Norwegian Forest Cat owners feeling their cat's coat is "impossible to capture." And honestly, in flat media, they're not wrong. A photograph freezes one instant of light on that coat. A video captures movement but loses the tactile dimension.
A figurine does something different. It holds the spatial truth of your cat—the volume of that ruff, the cascade of that tail, the way light wraps around the form differently depending on where you place it in your home. Morning light from the east window catches the silver guard hairs. Evening lamp light warms the cream undercoat. The figurine isn't static. It lives in your light, changes with your days, maintains a presence that flat images cannot.
That's not a sales pitch. That's geometry and optics doing what they do.
If your Norwegian Forest Cat's coat has ever made you think "nobody could capture this," consider that the complexity you see isn't a barrier—it's an invitation. Every ticked hair, every color shift, every dramatic plume is data. And full-color 3D printing speaks data fluently.
Your cat's coat isn't too complicated. It's exactly complicated enough to be worth capturing properly. And that Norwegian Forest Cat figurine you've been imagining? The technology to make it real already exists—color by color, layer by layer, voxel by voxel.
The light on your cat's fur right now, in this moment? It's worth holding onto.
Frequently Asked Questions
How does full-color 3D printing capture a Norwegian Forest Cat's complex coat?
Full-color 3D printing works by depositing colored resin voxel by voxel—essentially building the figurine from millions of tiny colored cubes. Color is embedded directly in the material during printing, not applied afterward. This means the subtle transitions between undercoat, awn hair ticking, and guard hair colors are all captured simultaneously in a single print process. There's no painting step that could lose detail or introduce interpretation error between the sculpted form and the final color.
What photos work best for a custom long-haired cat figurine?
Diffused natural light from five key angles gives us the most usable information: direct profile, three-quarter front, direct front face, top-down back view, and a dedicated tail shot. Overcast days are ideal because even lighting reveals true coat colors without hot spots or color casts. You don't need an expensive camera—a phone near a window on a cloudy day often produces better reference material than a DSLR with flash.
Is a Norwegian Forest Cat's coat too detailed for a 3D printed figurine?
Not at all—and this is the counterintuitive part. Long, dramatic coats actually give our digital sculptors more to work with. The bold fur groupings, separated ruff sections, and flowing tail plume create strong, readable geometry that translates powerfully to a figurine. Short-haired cats, ironically, are often harder because they rely on extremely subtle surface texture to avoid looking smooth.
How durable is a full-color resin cat figurine?
Full-color resin protected by a clear coat is quite resilient for display purposes. The main care considerations: avoid prolonged direct sunlight (indirect light is fine), keep it at normal indoor temperatures, dust with a soft brush rather than a damp cloth, and handle by the base rather than delicate features like tail tips or ear tufts. If something does chip or break, resin repairs are possible—contact the team rather than attempting DIY fixes.
What's the difference between a full-color 3D printed figurine and a traditionally painted one?
The fundamental difference is where color lives. In full-color 3D printing, pigment is part of the resin material itself—color and form are created simultaneously from the same digital file. Traditional figurines are printed or cast in a single color (usually white or gray), then painted by hand afterward. That two-step process creates a gap between shape and color where subtle details can be lost or reinterpreted. Full-color printing eliminates that gap entirely.
Can you match my cat's exact unusual coloring in a figurine?
Yes, and unusual colorings are actually an advantage. Distinctive features—rare cinnamon tones, asymmetrical white patches, unusual ticking patterns—make a figurine immediately recognizable as your cat rather than a generic breed representative. Our digital sculptors triangulate color across multiple reference photos to find the perceptual truth of your cat's coloring, then work with you during the preview stage to confirm accuracy. For details on how the revision process works, check the PawSculpt FAQ.
Ready to Celebrate Your Norwegian Forest Cat?
Every Wegie has a coat that tells a story—layers of color, texture, and light that make them unmistakably themselves. Whether you're honoring a companion whose presence still fills your home or celebrating the magnificent creature currently shedding on your couch, a custom PawSculpt figurine captures the full complexity of that coat in permanent, full-color resin. No detail dismissed as "too complicated." No layer left behind.
Create Your Custom Norwegian Forest Cat Figurine →
Visit pawsculpt.com to explore the full process, see examples, and learn about current turnaround times and guarantees
